這是很有趣的一個梯次,在上課前,同學們普遍對自己沒什麼信心,覺得才剛安裝試用版,真的可以畫出整套 SCI 統合分析的圖片嗎?
但到了互動實作時間結束時,上傳圖片的同學非常多,而且即使有些還可以建議的細節,整體品質卻都已經是可以投稿的水準。真的非常厲害。
在評選最後得獎者時,甚至有六位的圖片都沒有問題,最後只好根據圖片順序是否正確來排序,選出最後的得獎者。
以下,看看那些還能建議的細節,以及得獎同學的作品吧!
那些還能建議的細節
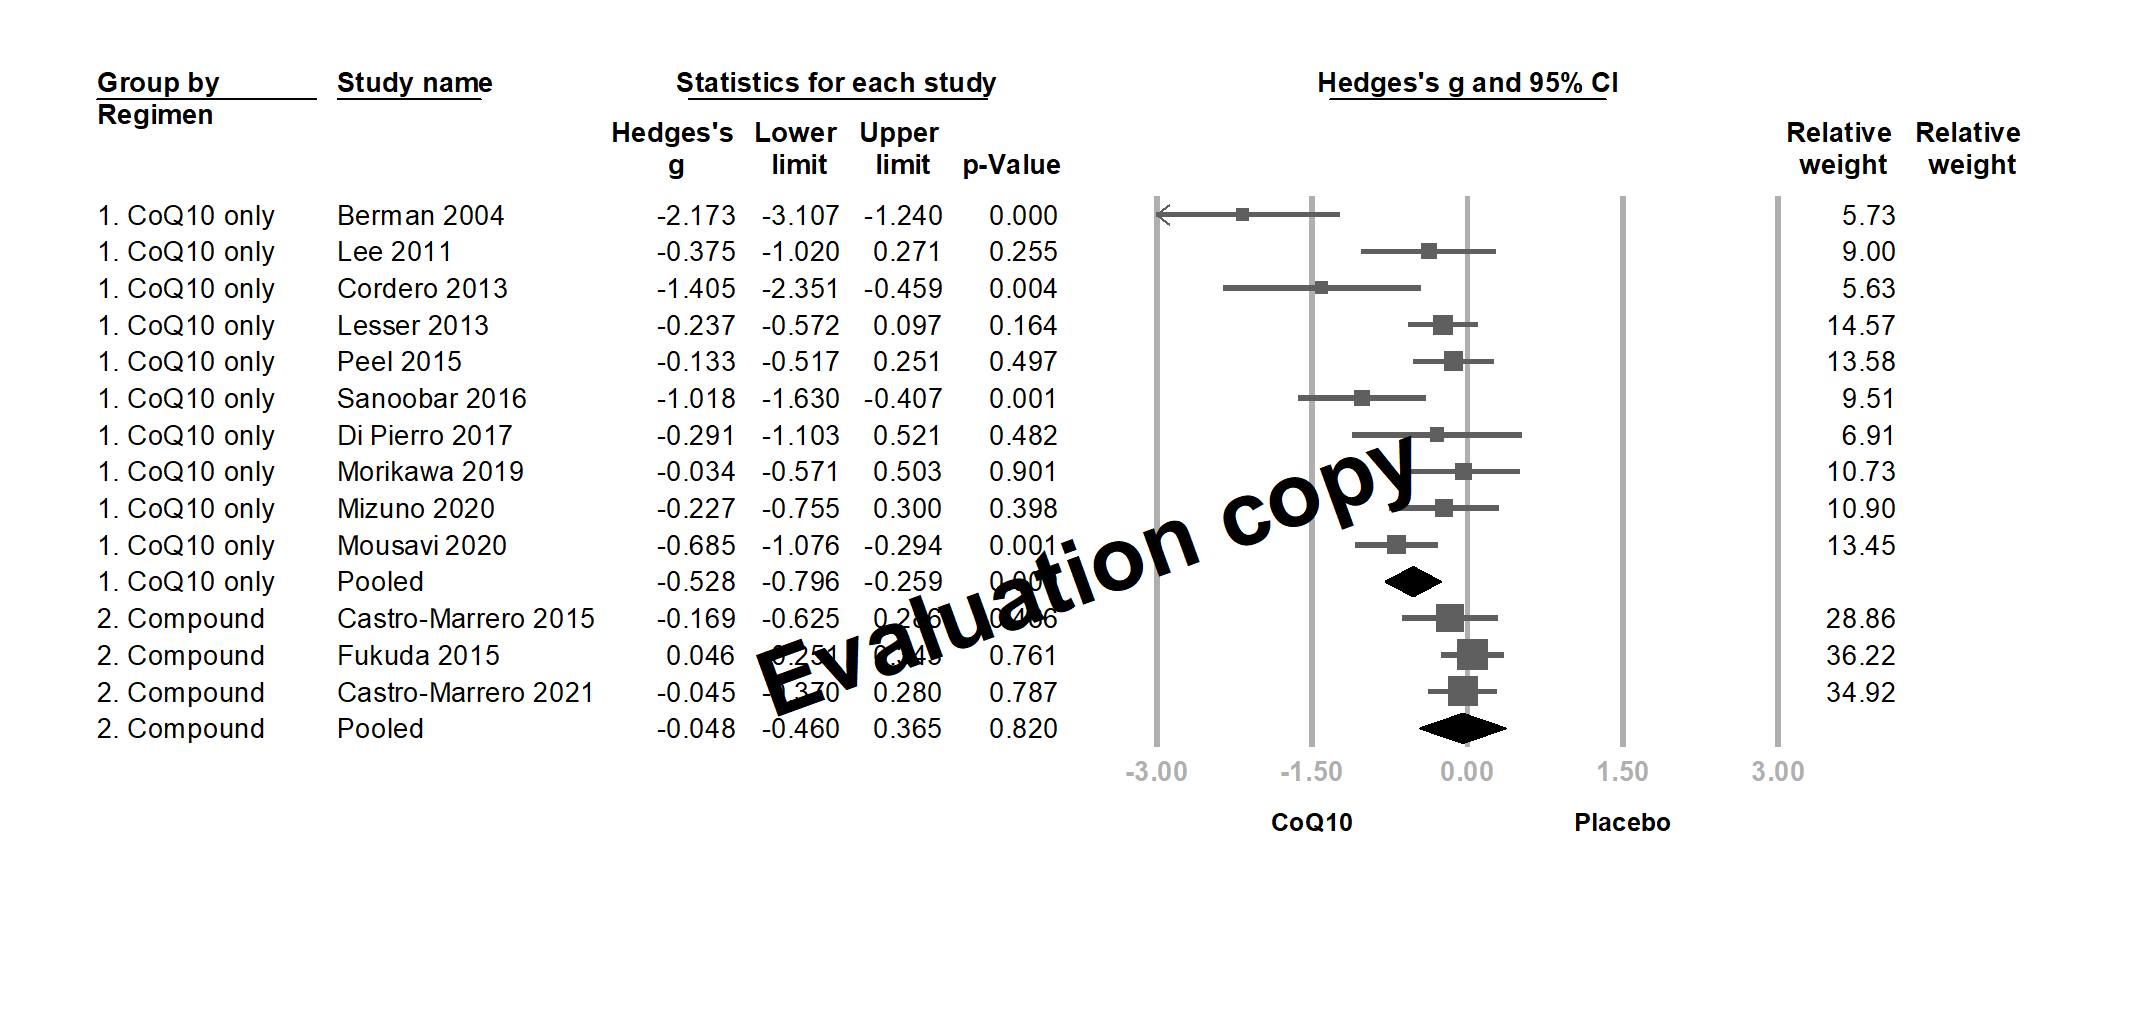
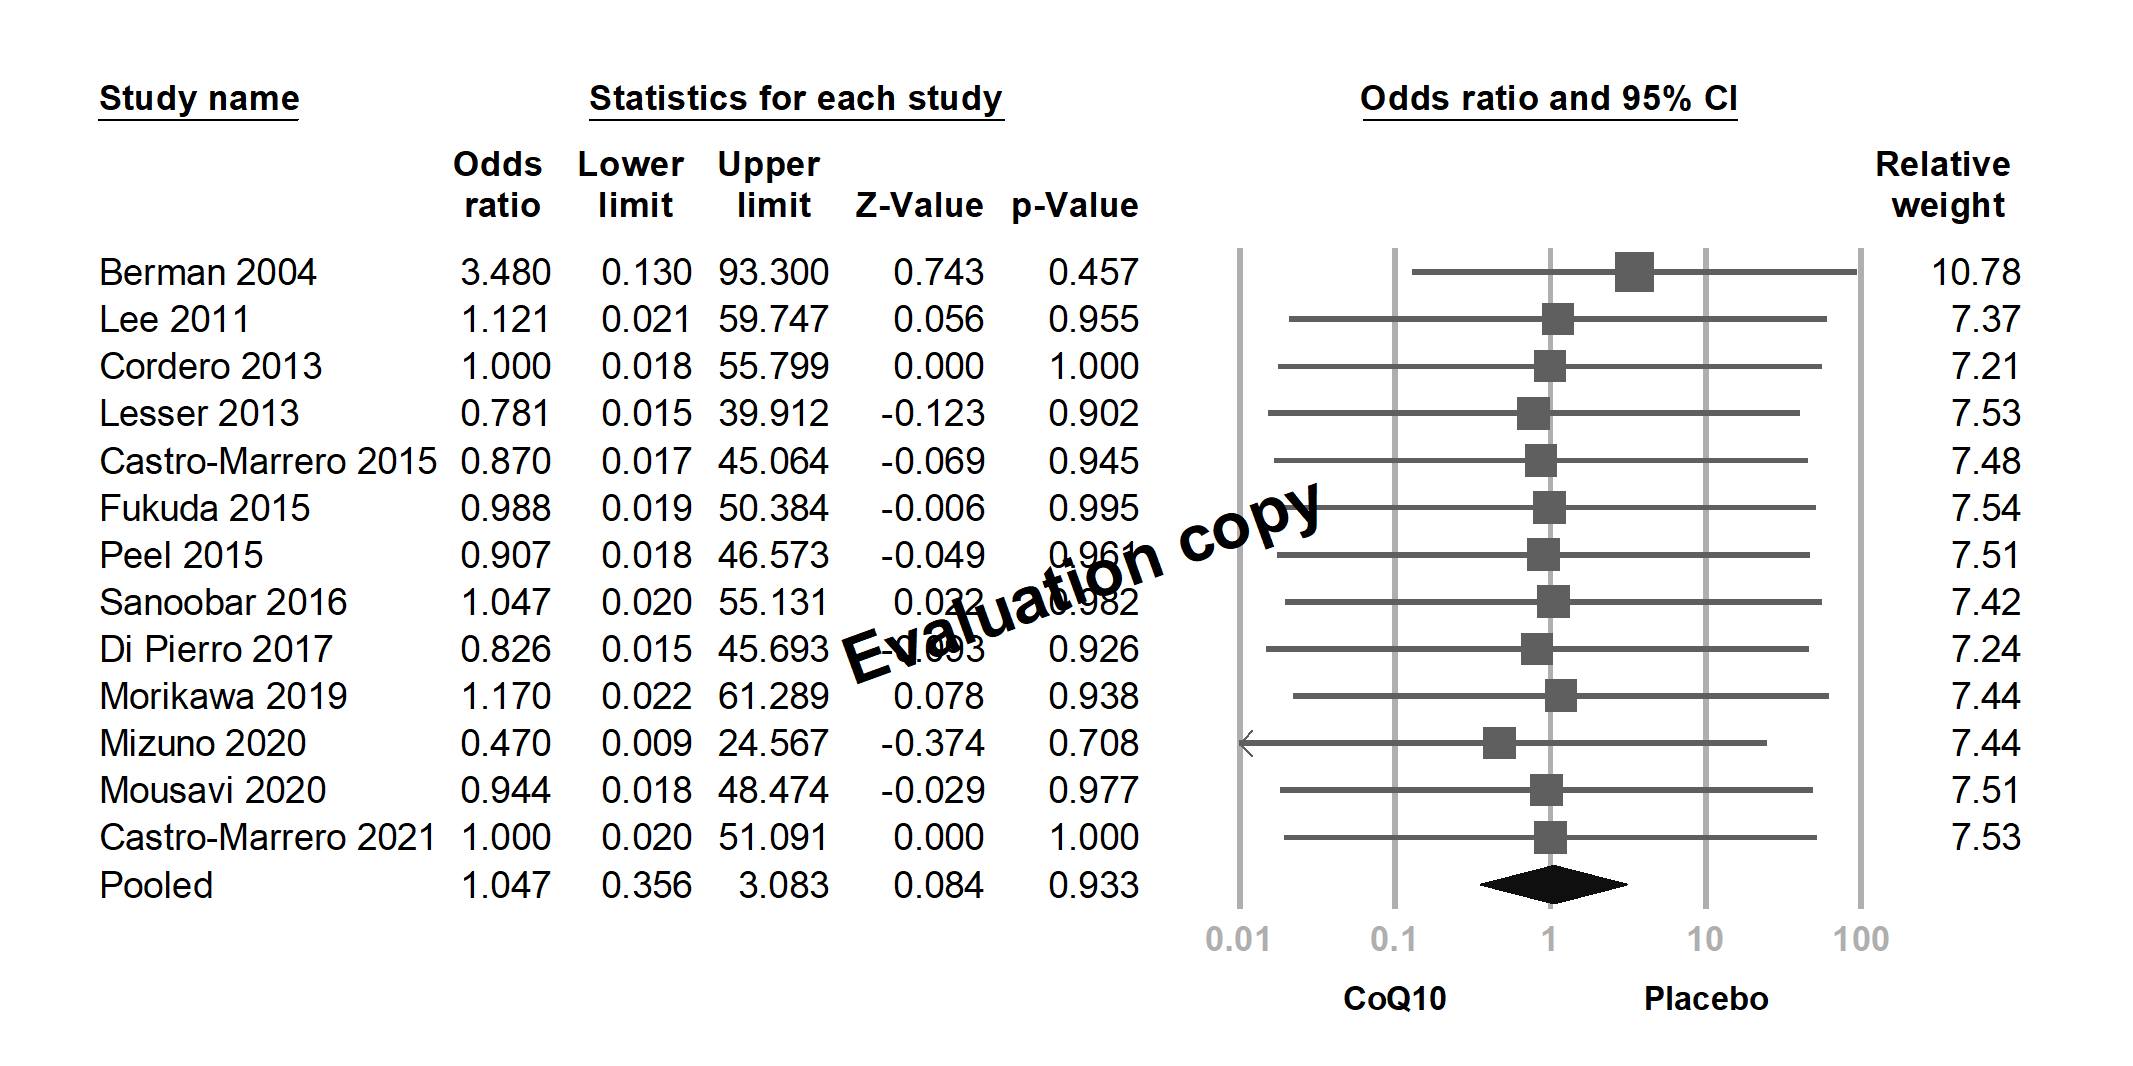
建議取消下方橫線。右邊的 weight 請記得加上囉。
建議照手冊第 33 頁上方的步驟,將 bar graph 去掉,避免右邊出現空白欄位。
右邊的 weight 忘了加上,有些可惜,補上即可。
圖片下方留白太多,可以在作圖的時候就收緊,或者事後裁切也行。
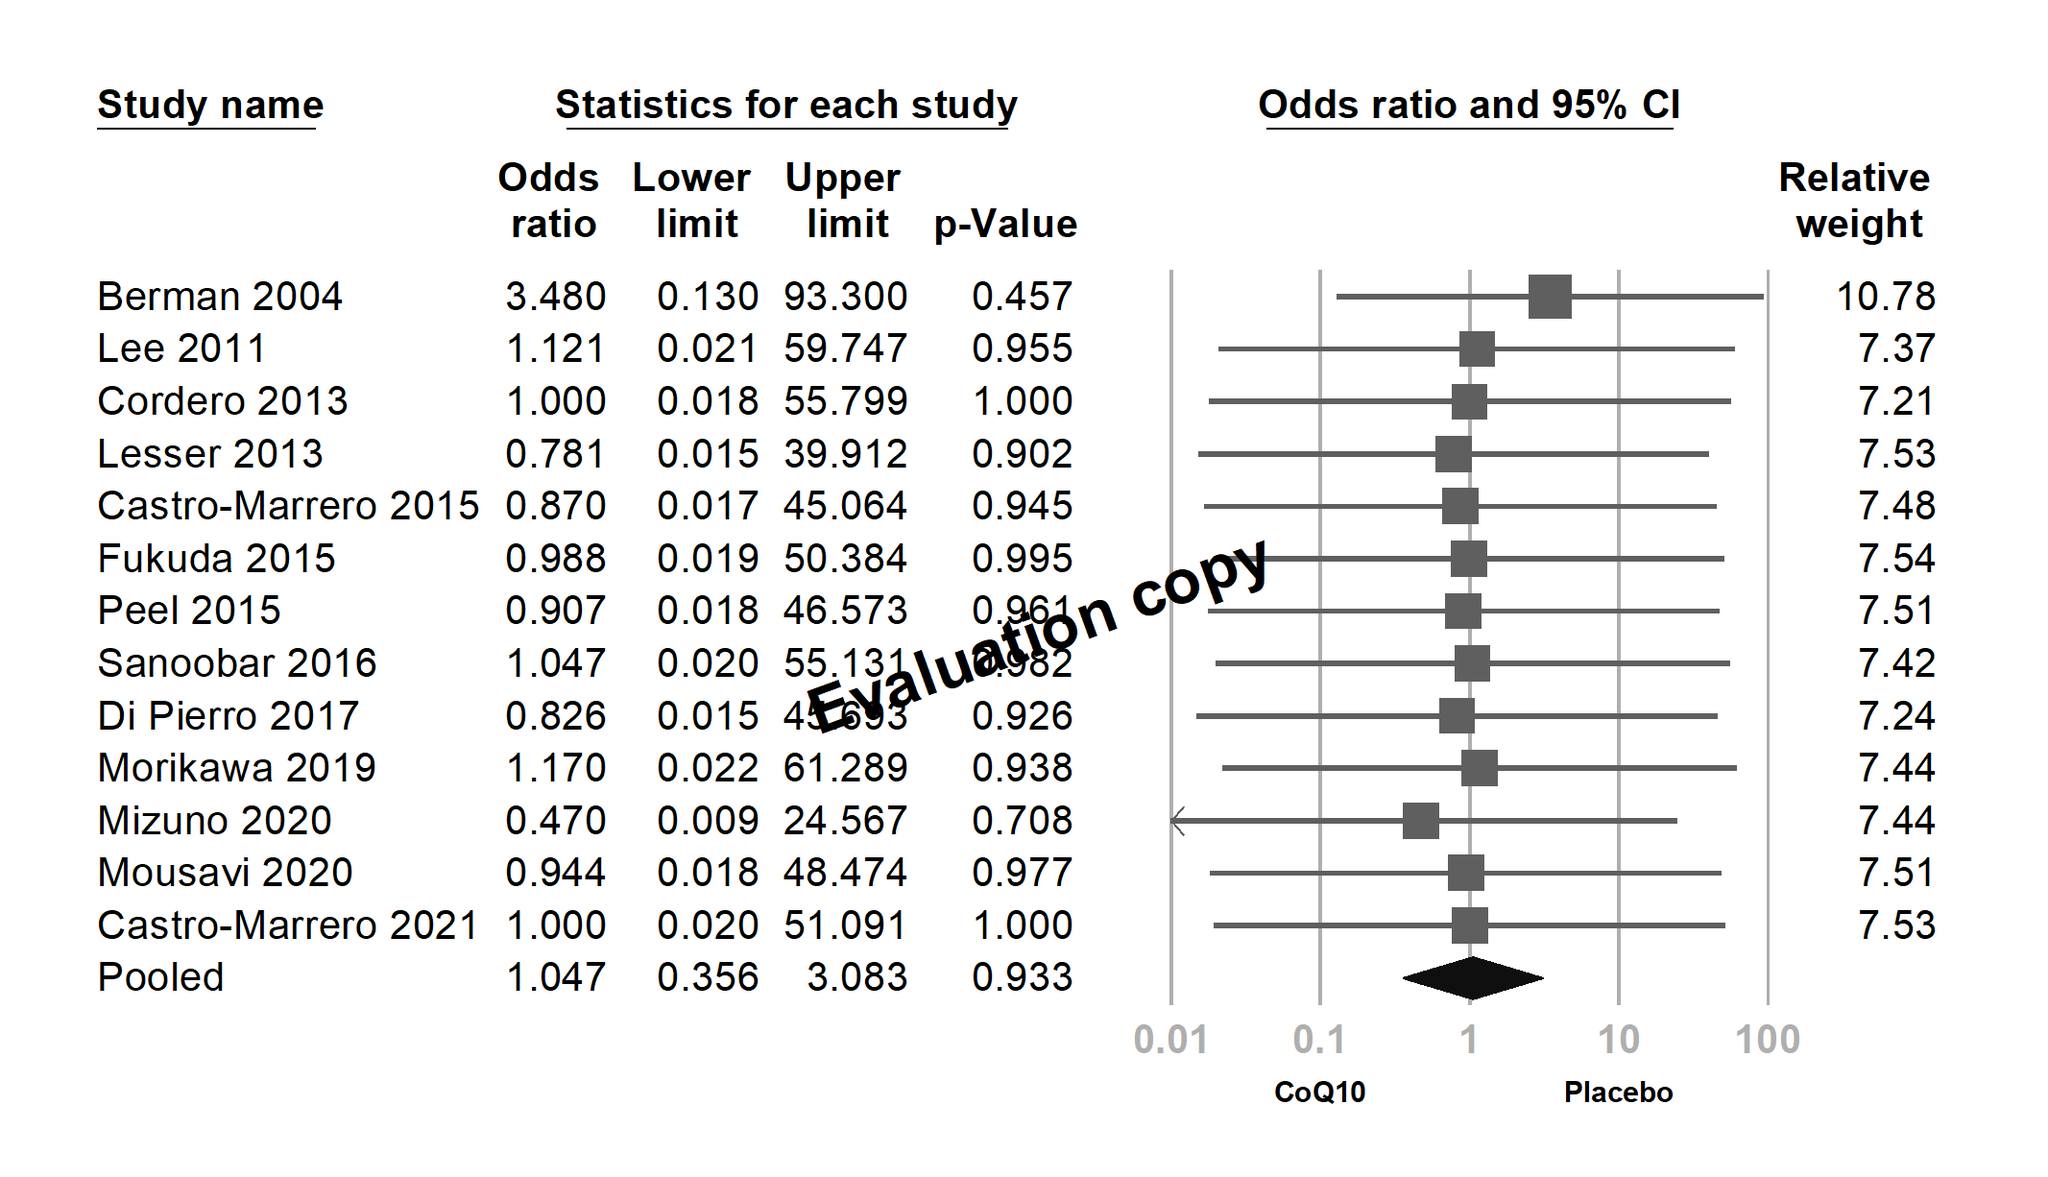
欄位 Z-Value 請記得去除。
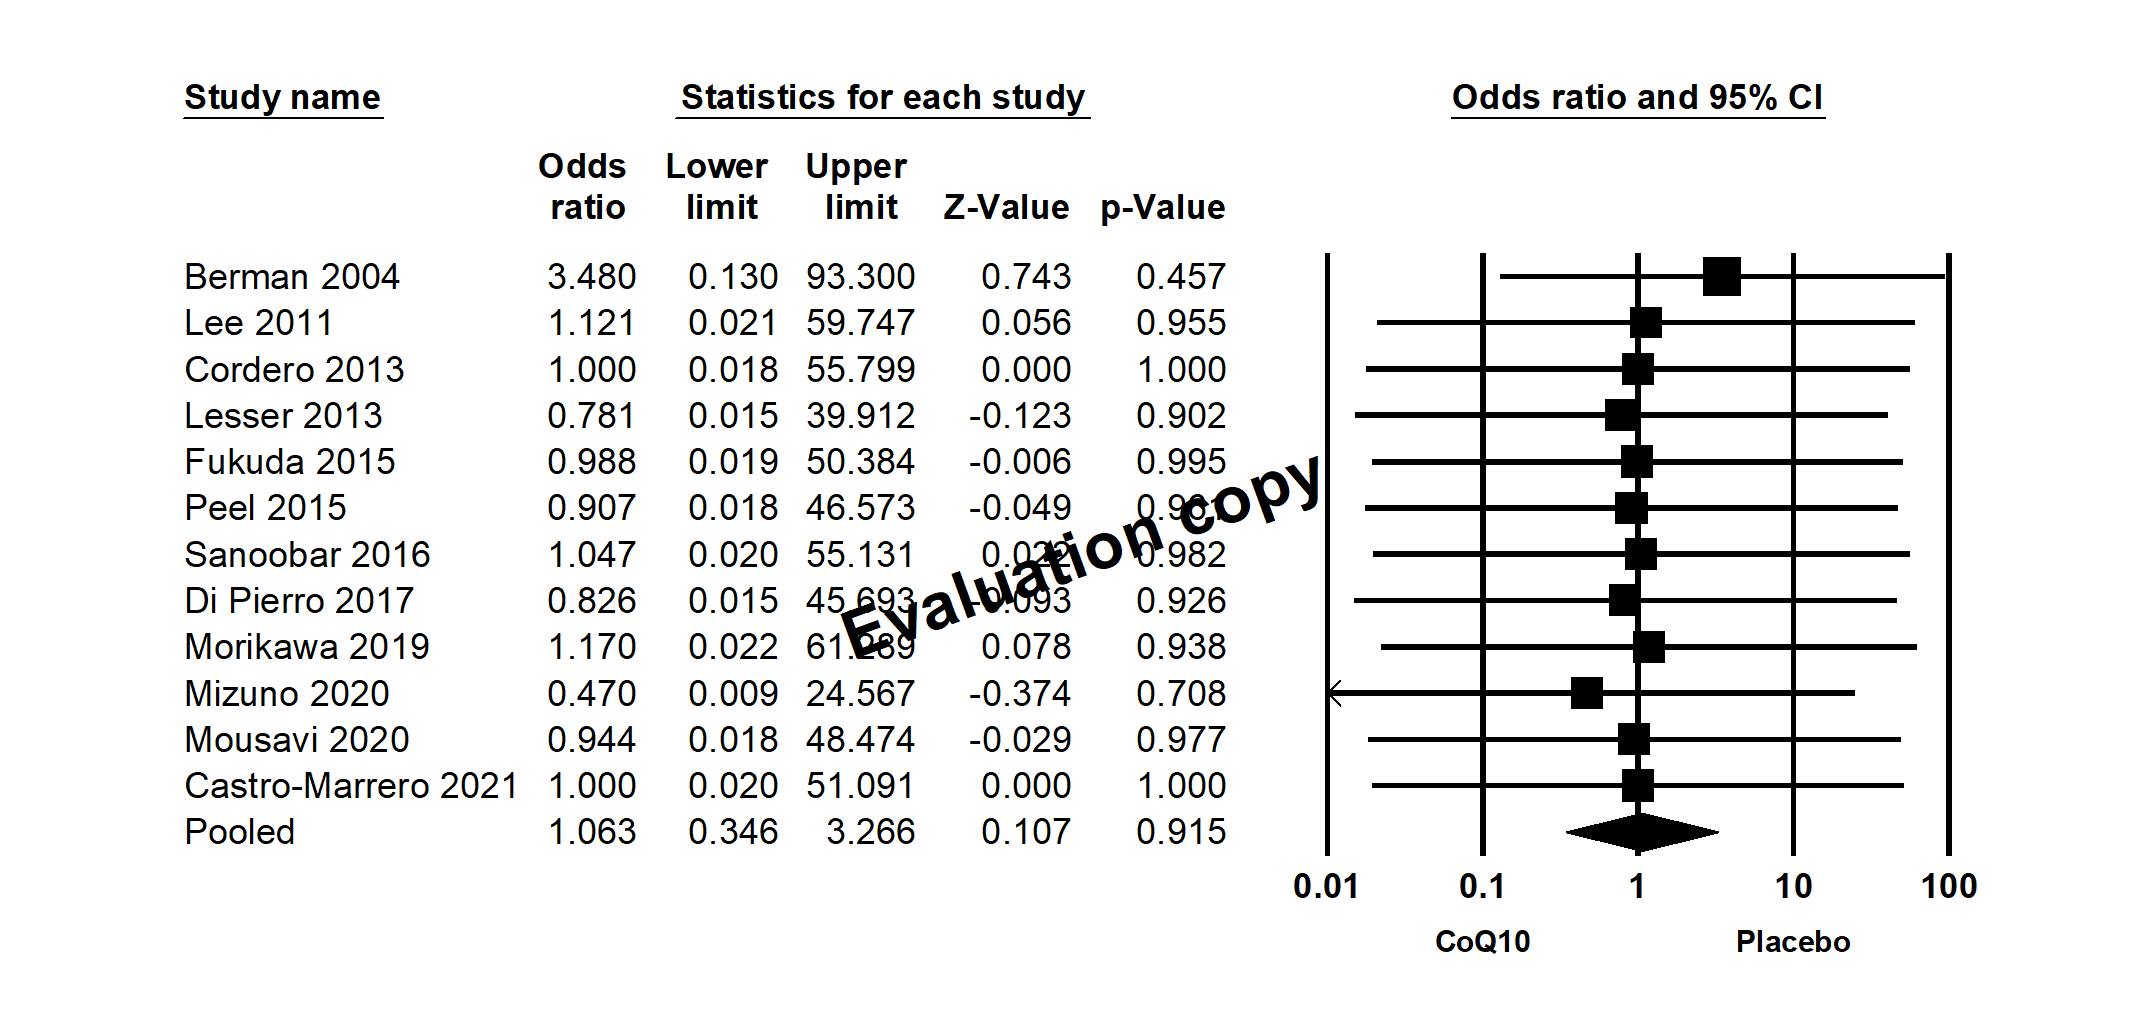
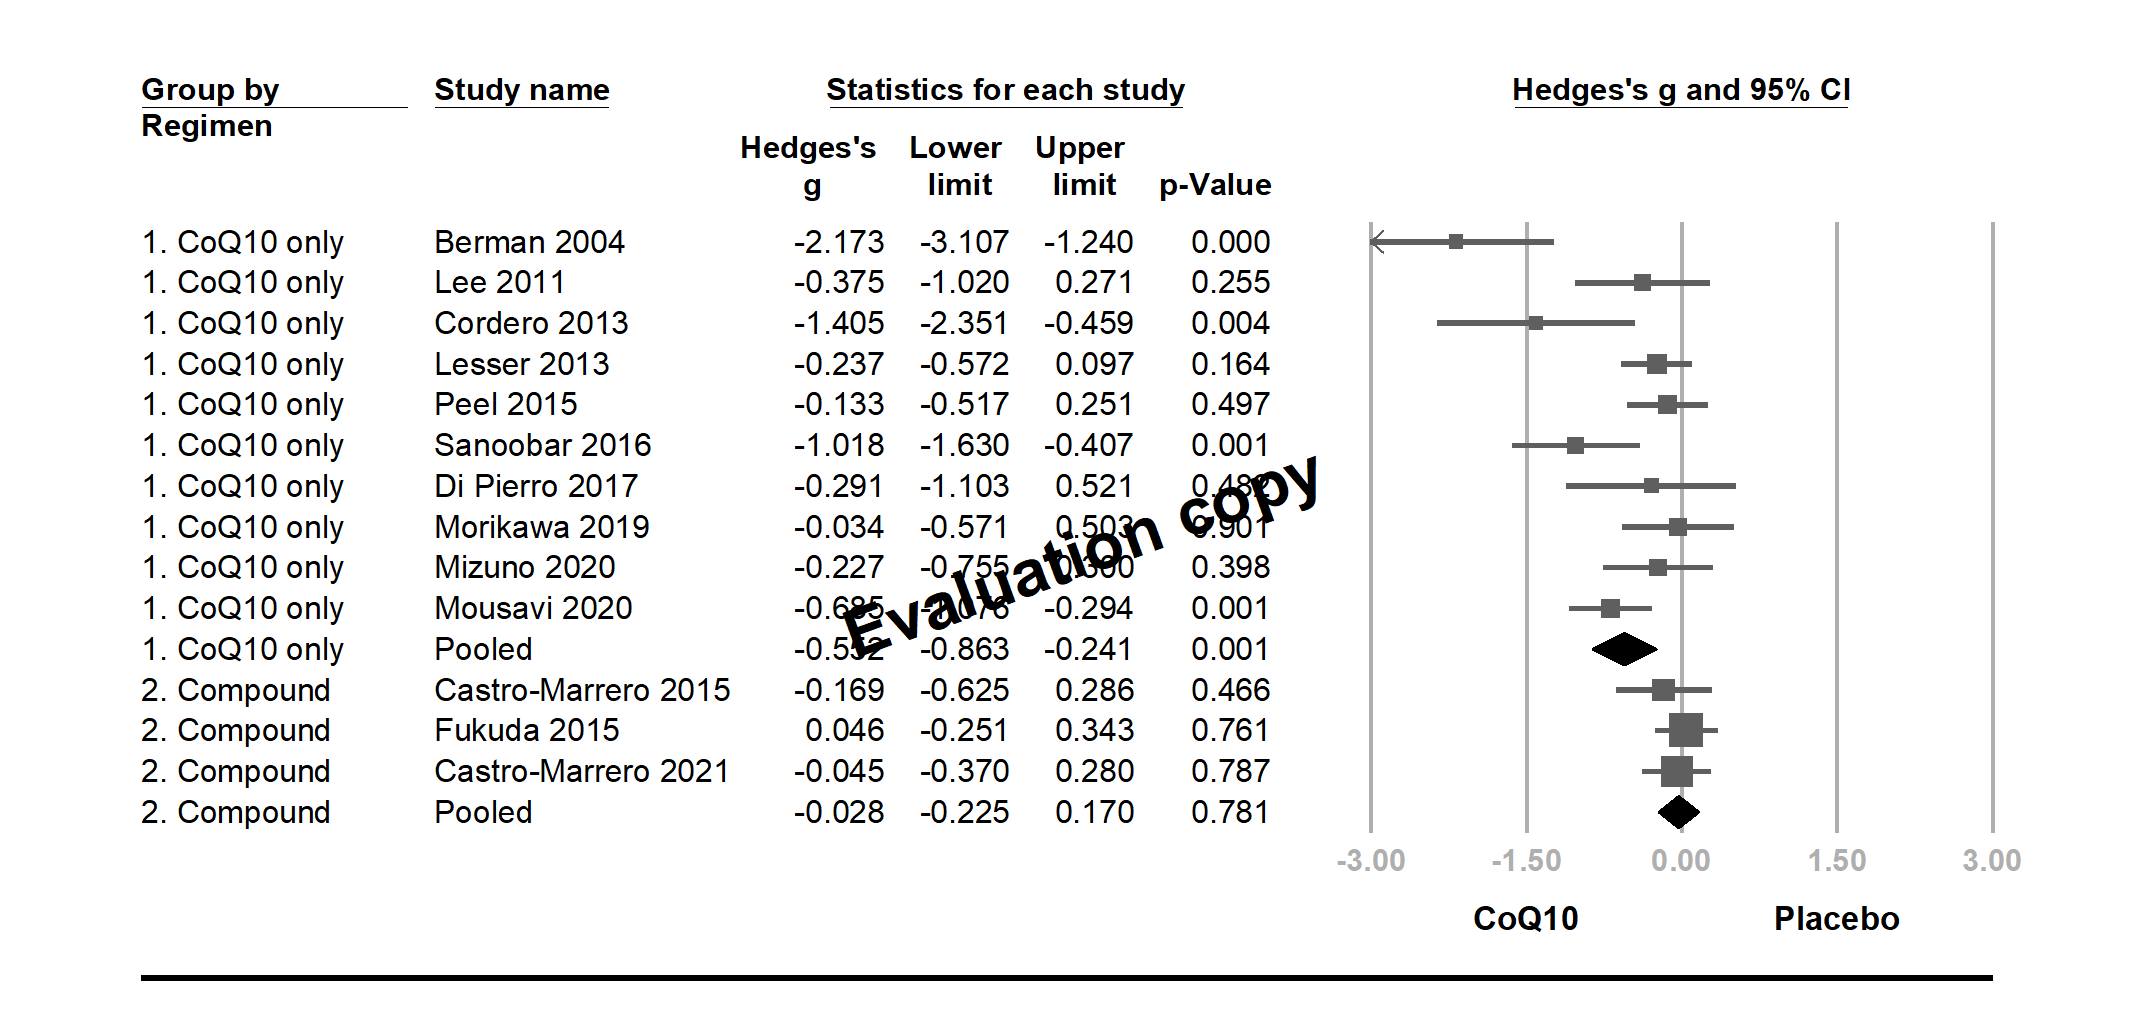
欄位 Z-Value 請記得去除。右方的圖示區,建議照範例做灰階,因為全黑的壓迫感太重,層次感也消失,有些可惜。
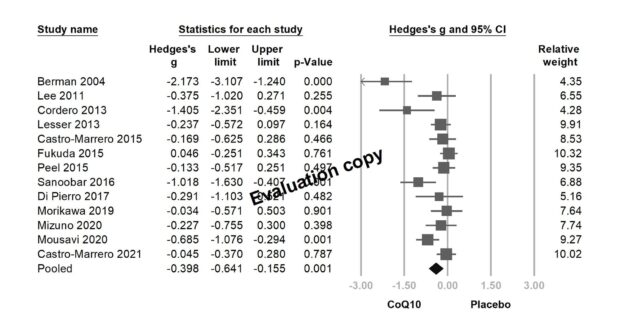
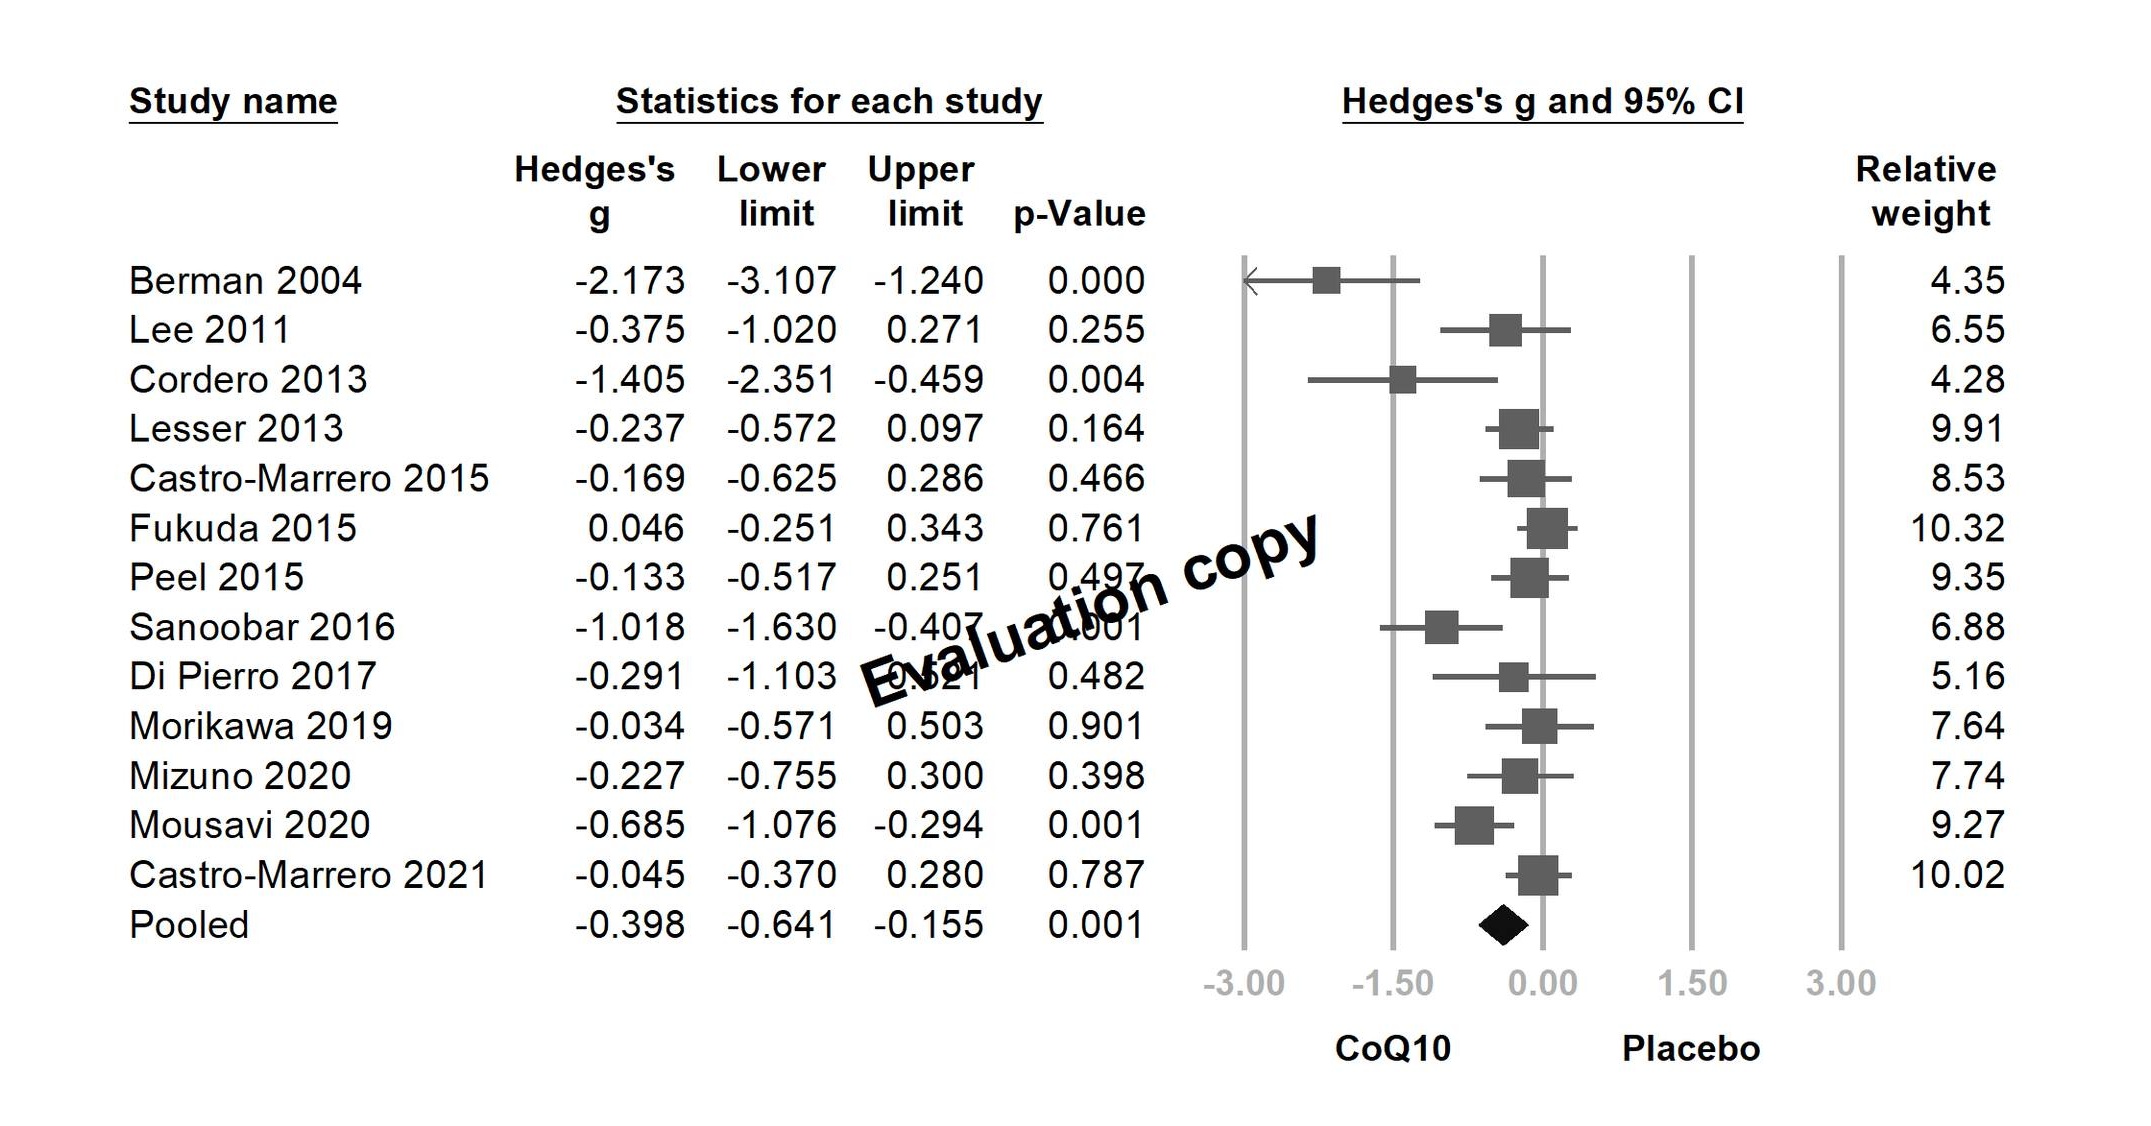
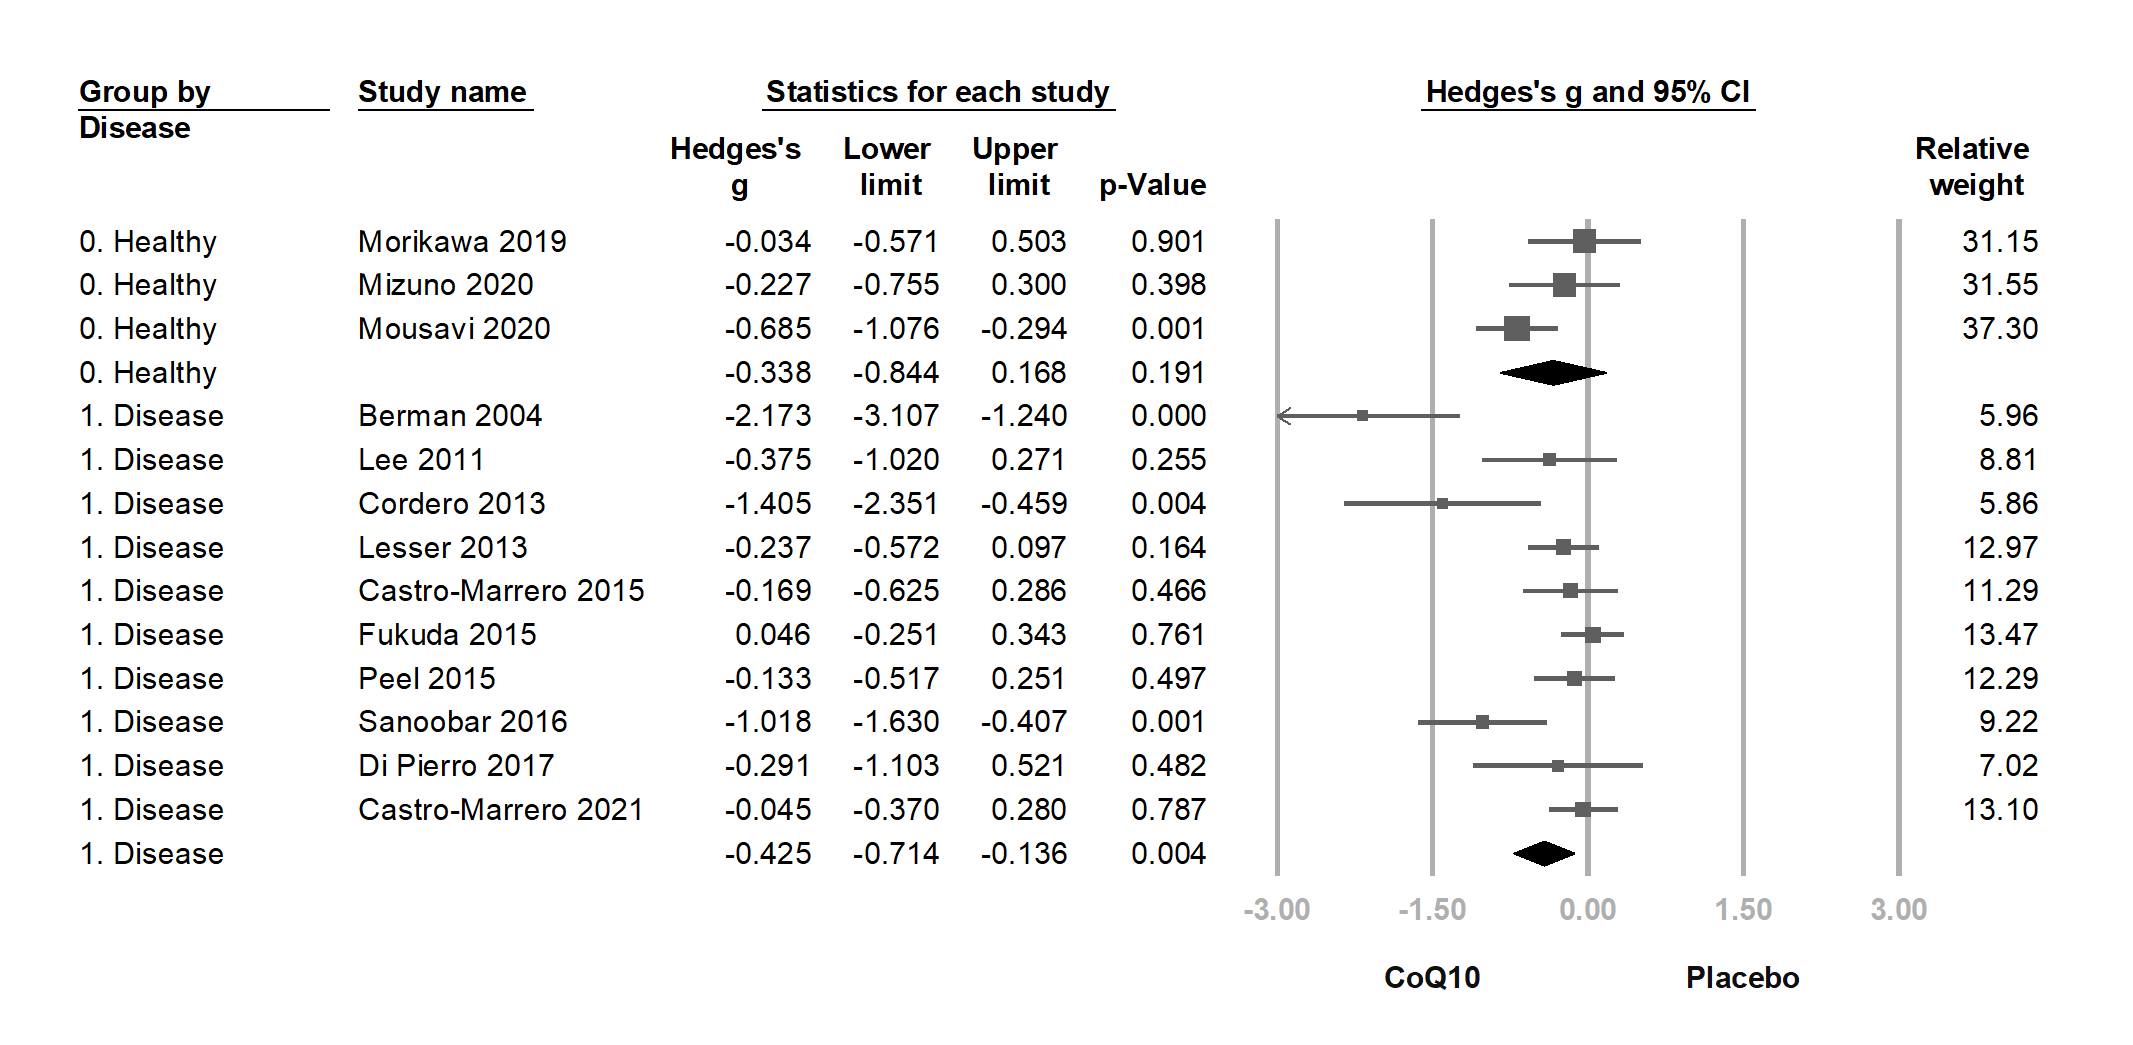
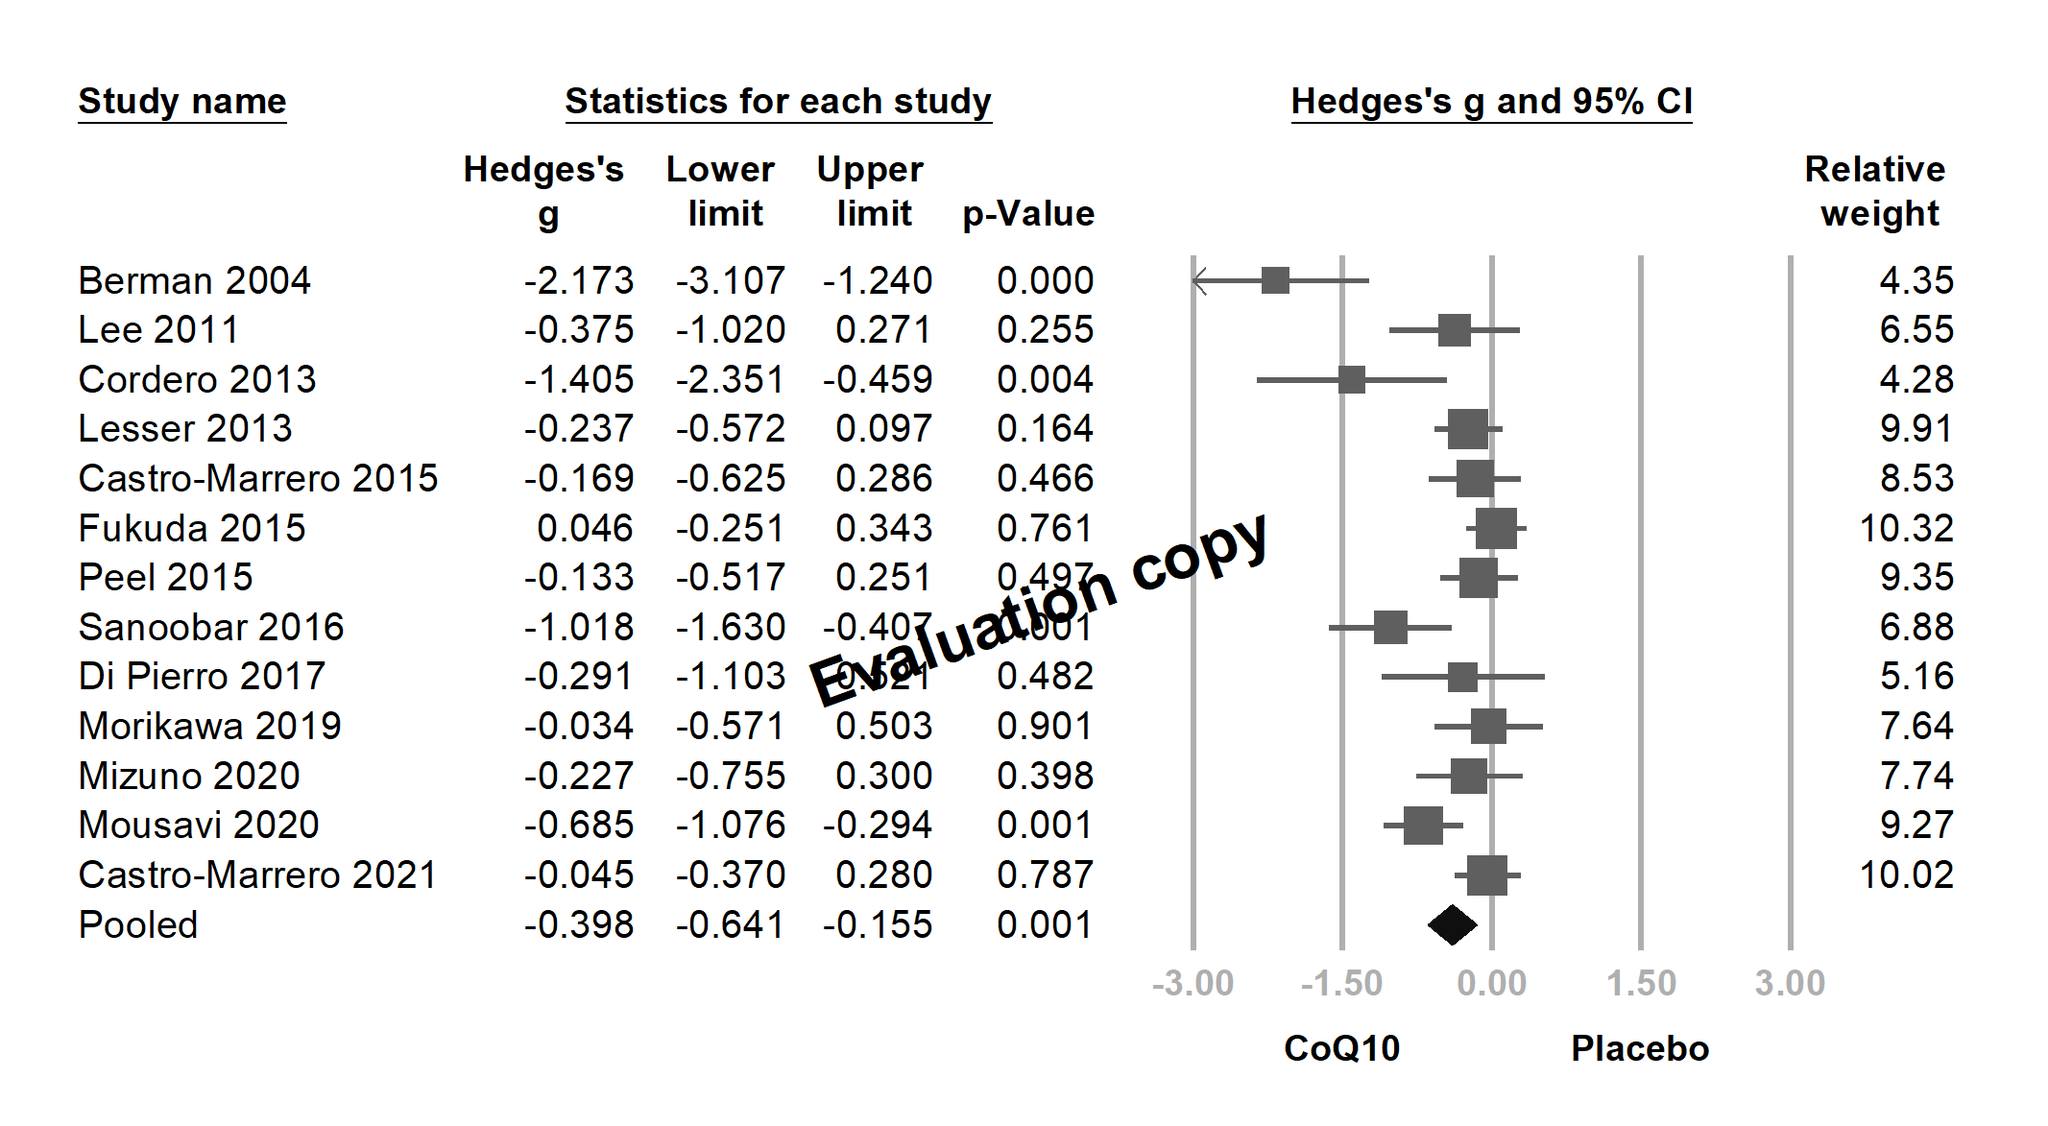
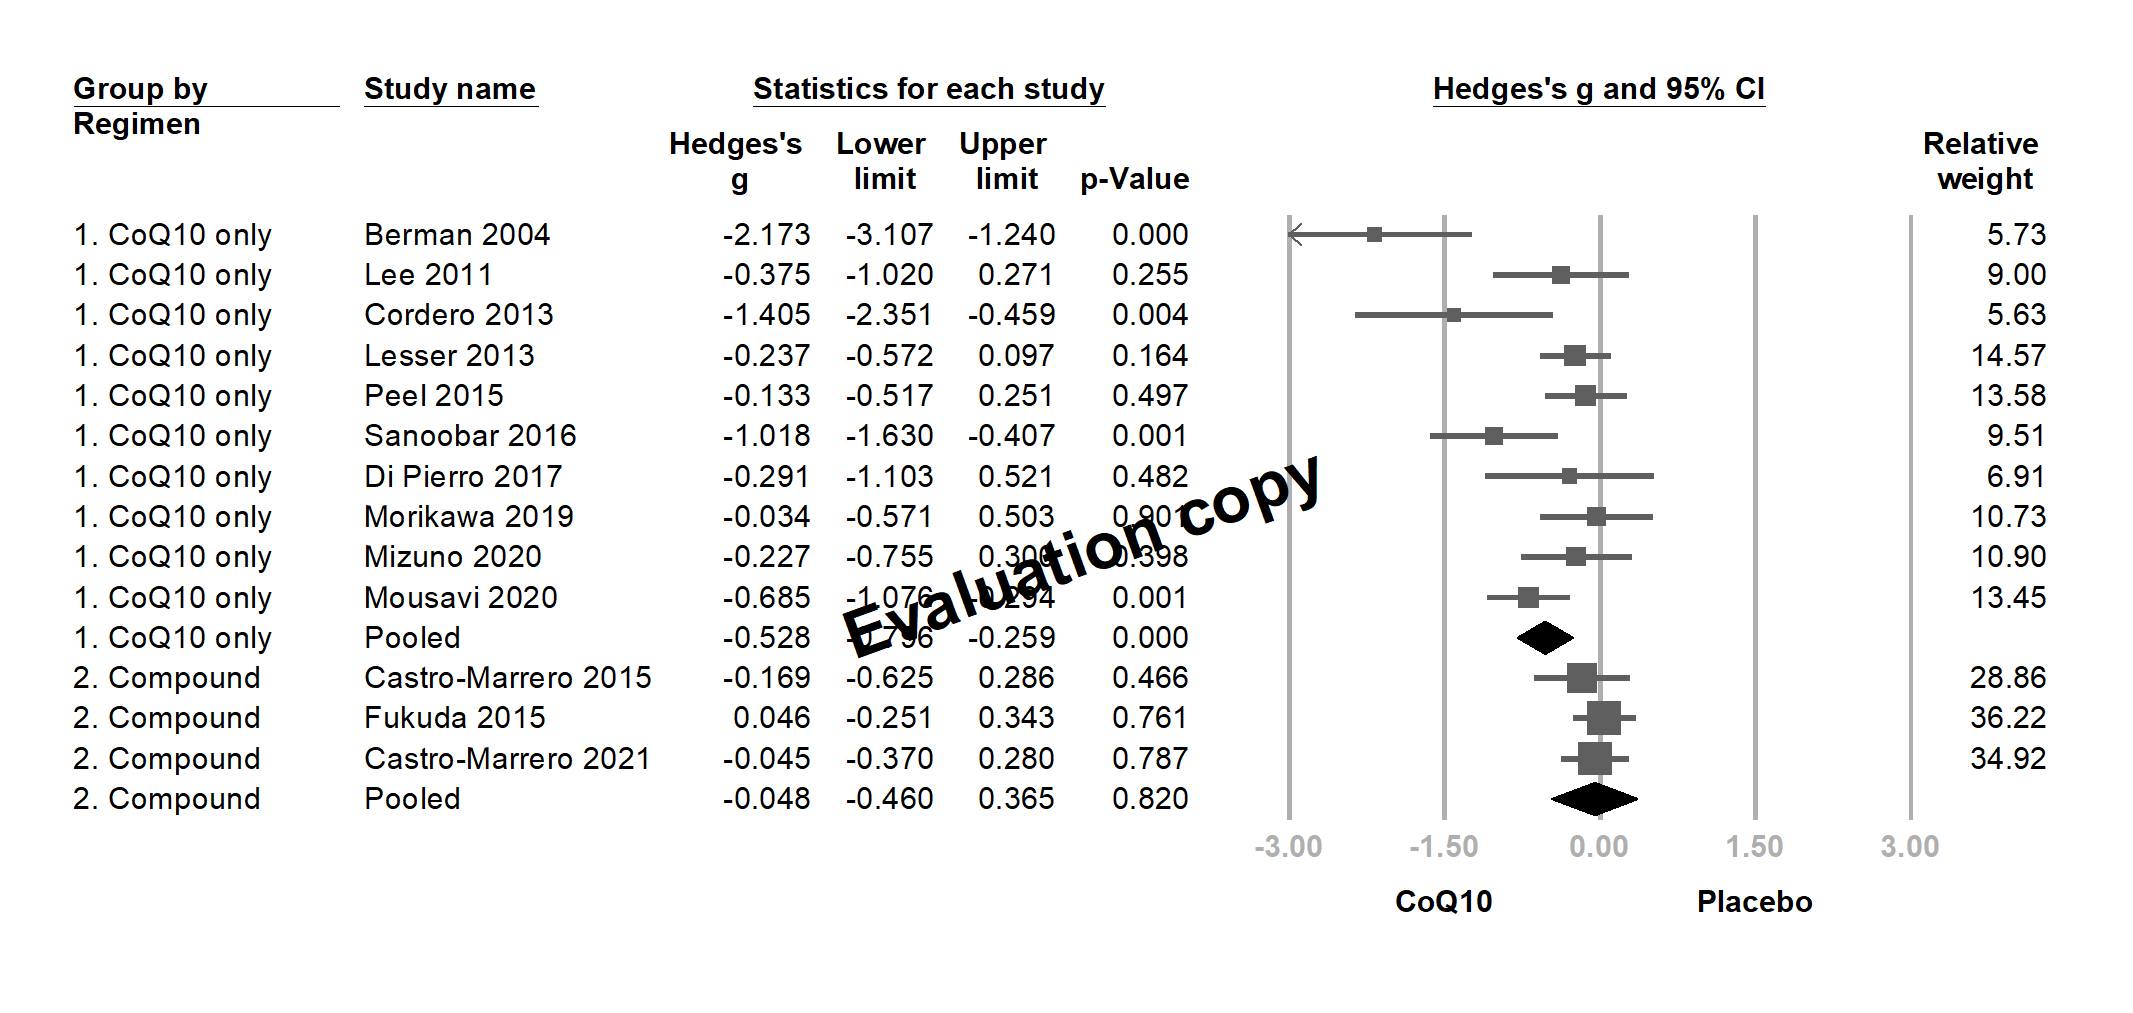
這個有點細微,就是究竟下方的標籤,右邊該標 Placebo 或 CoQ10?雖然都可以,但建議要有自己的想法會比較好。因為寫 Placebo 可以說是 Favor placebo,但寫 CoQ10 則是表示 CoQ10 較多一個副作用,在指定論文我們是選擇填上 CoQ10 的。請參考。

XY 軸文字,可用 Font 功能將文字變大。也可用 Decimals 功能將小數點位數做處理。
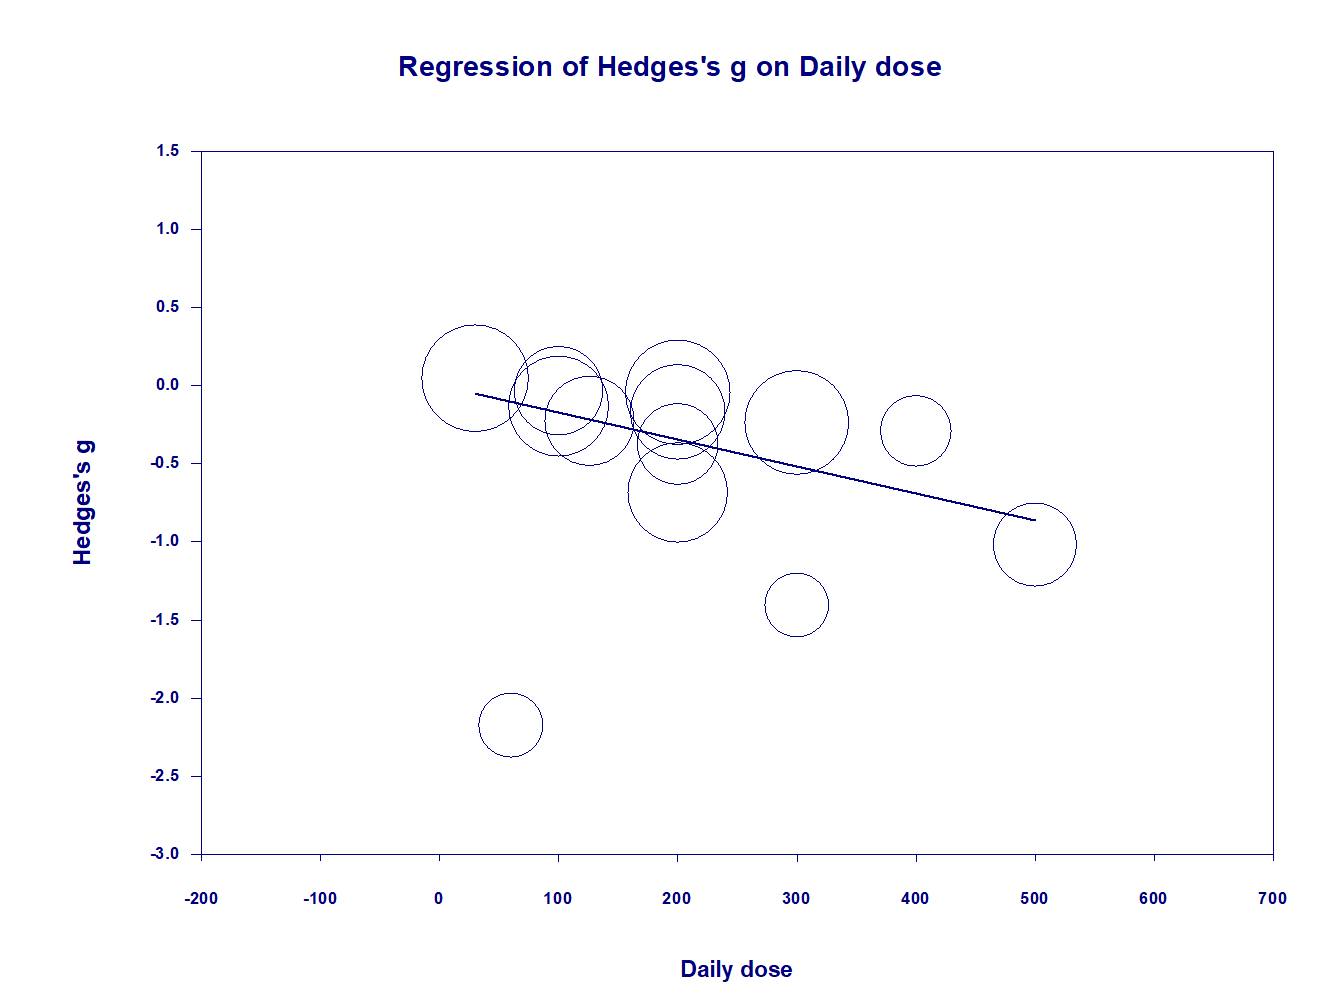
不明原因,很少數人的電腦出這張圖的時候,會變成藍色的。不過這很好解決,記得改成全黑即可!
以上都是小細節的建議,接著,我們來看看兩位得獎者的作品!
郭欣慧醫師

郭欣慧醫師的作品,整體感相當好,也沒有明顯的錯誤。這張總分析沒問題。

敏感性分析也很好,風格跟之前的圖片一致。
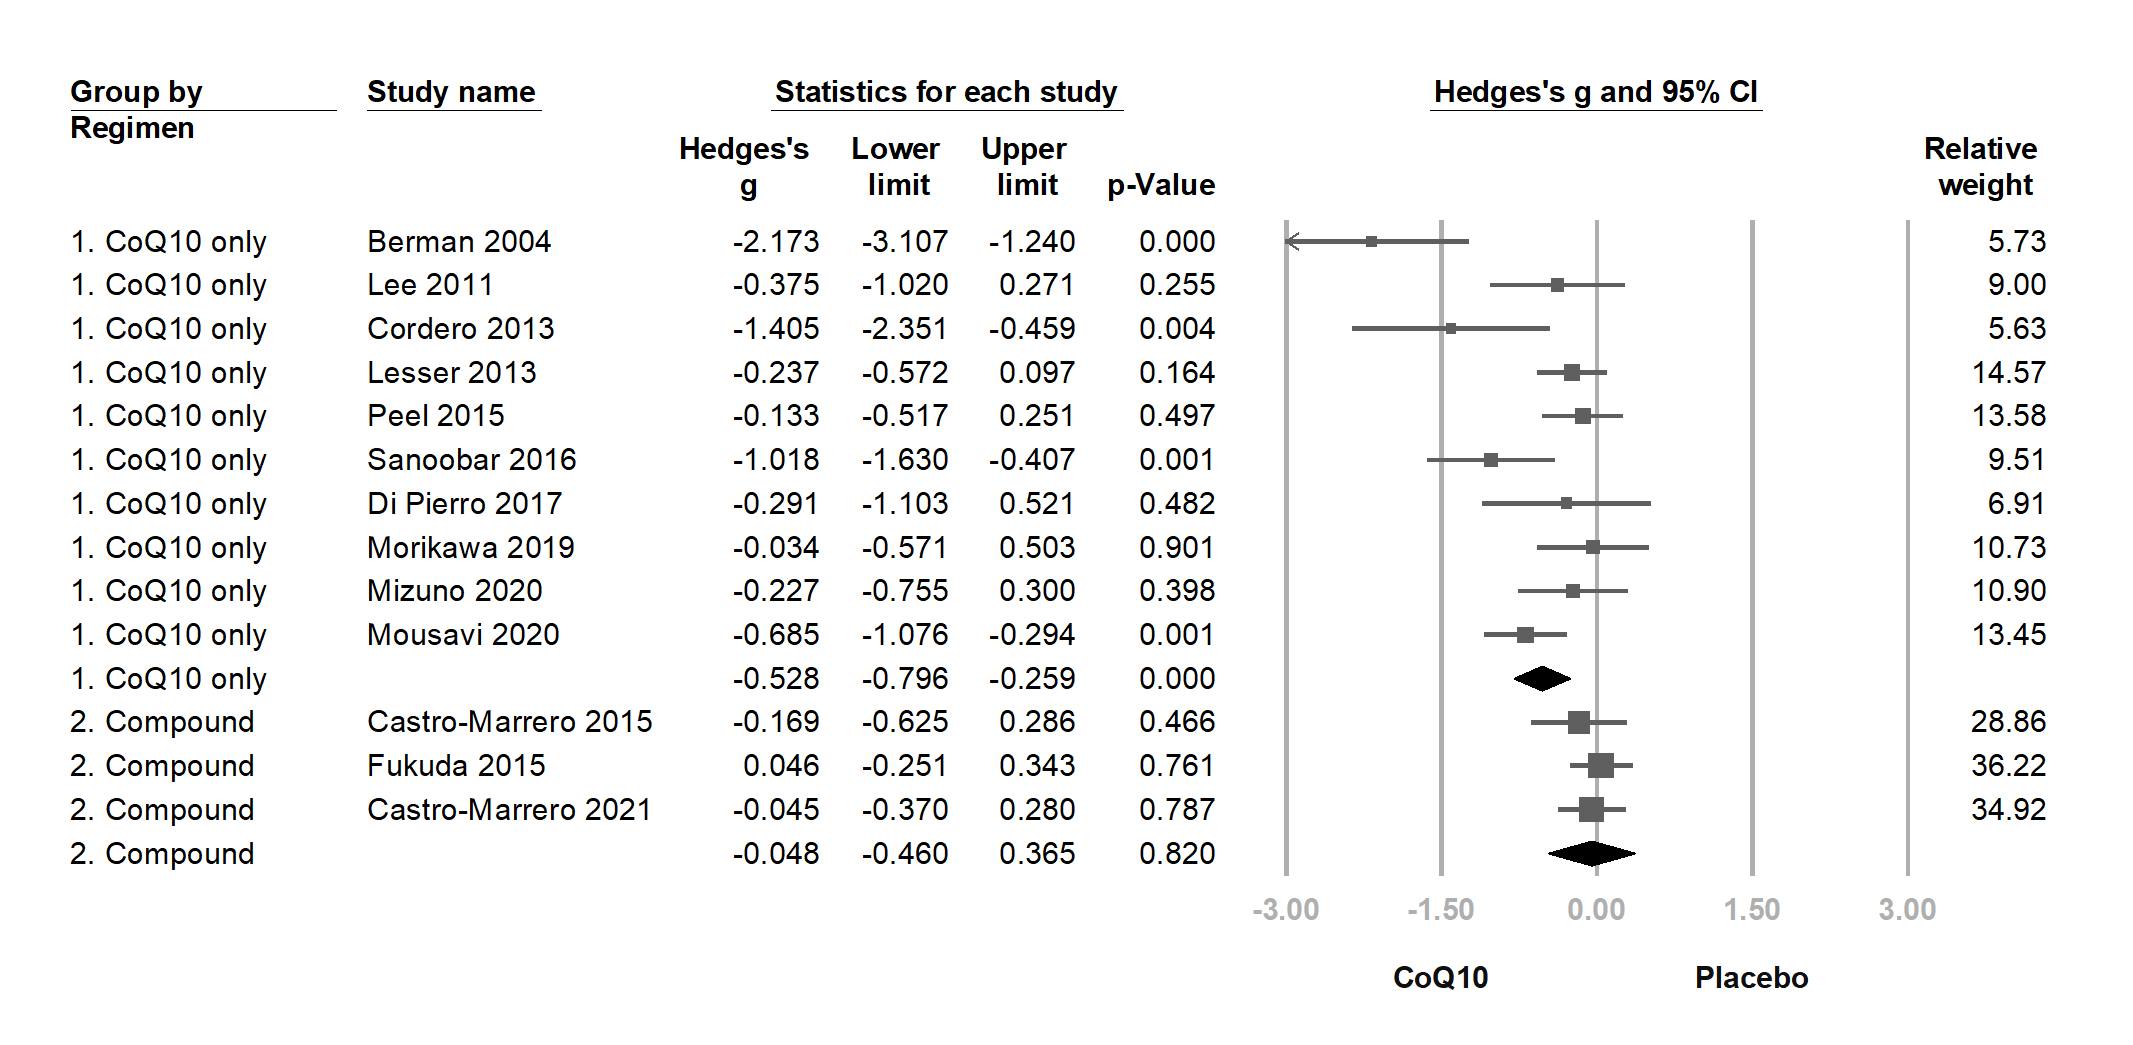
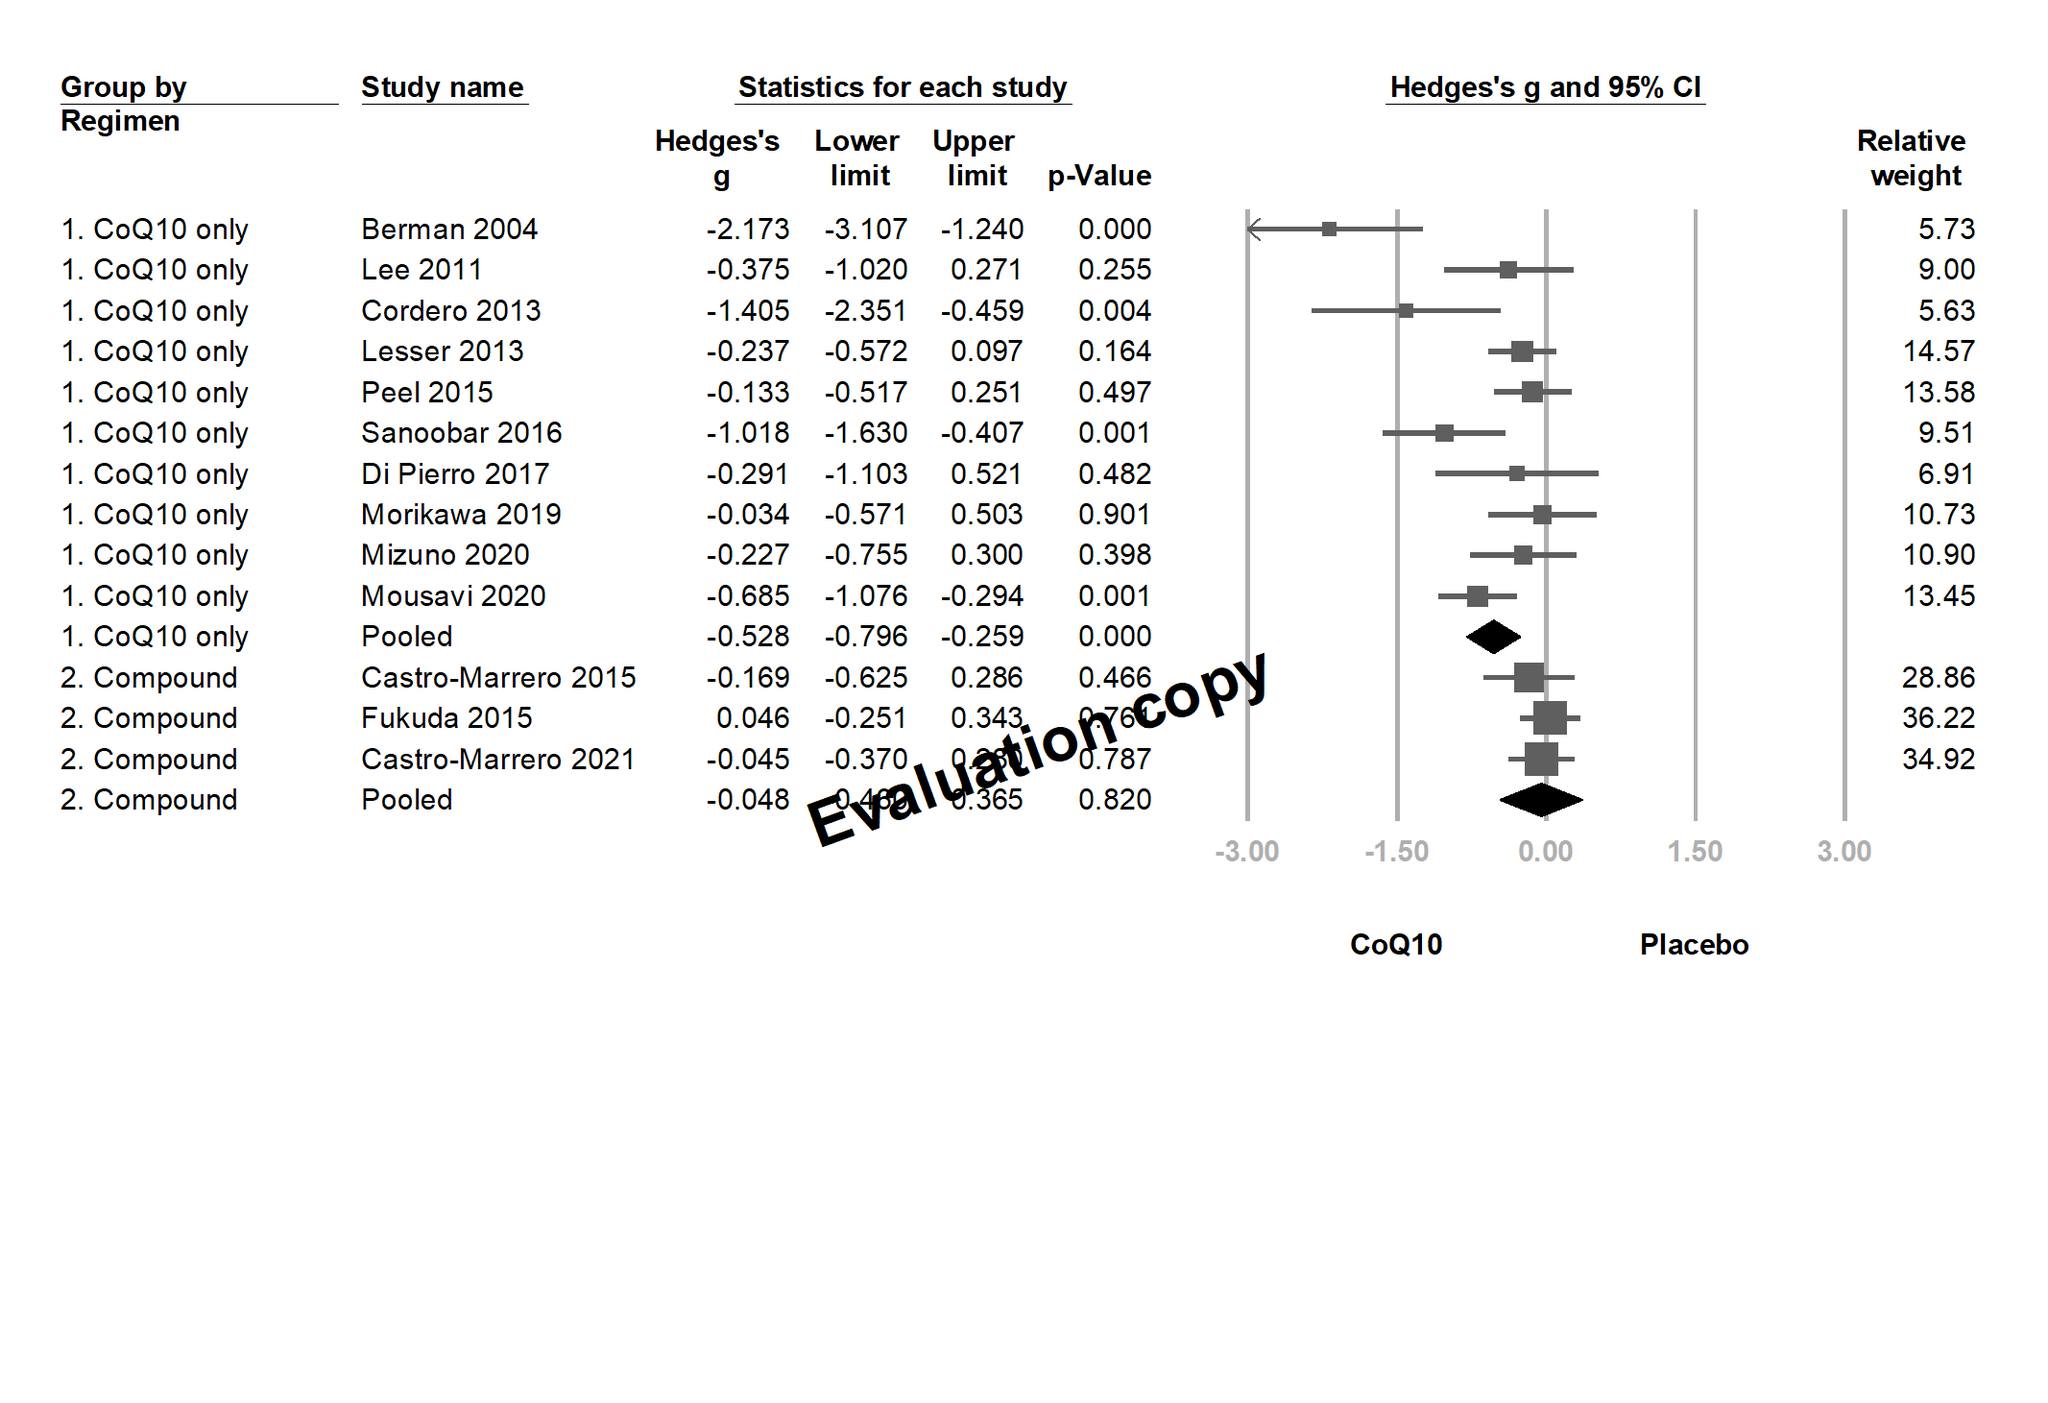
分組分析兩張,細節上都很棒。郭醫師有稍微調過行距,不過因為 CMA 的行距調整並不是很直觀,我們在這次的改款其實把這部分的教學拿掉了,直出也是沒問題的。郭醫師的調整則處理得恰到好處,很不錯。
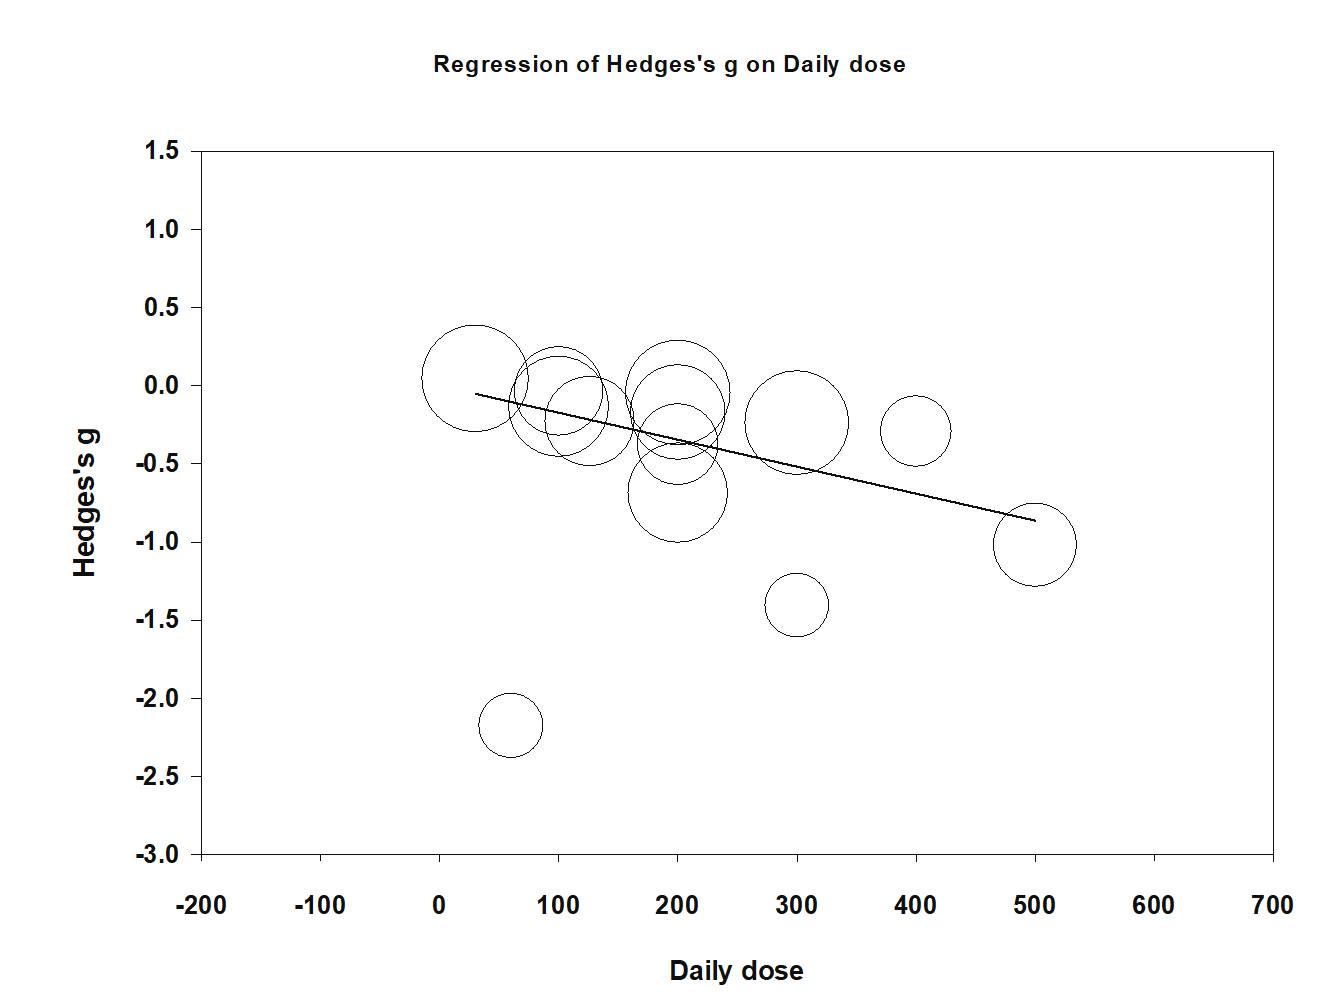
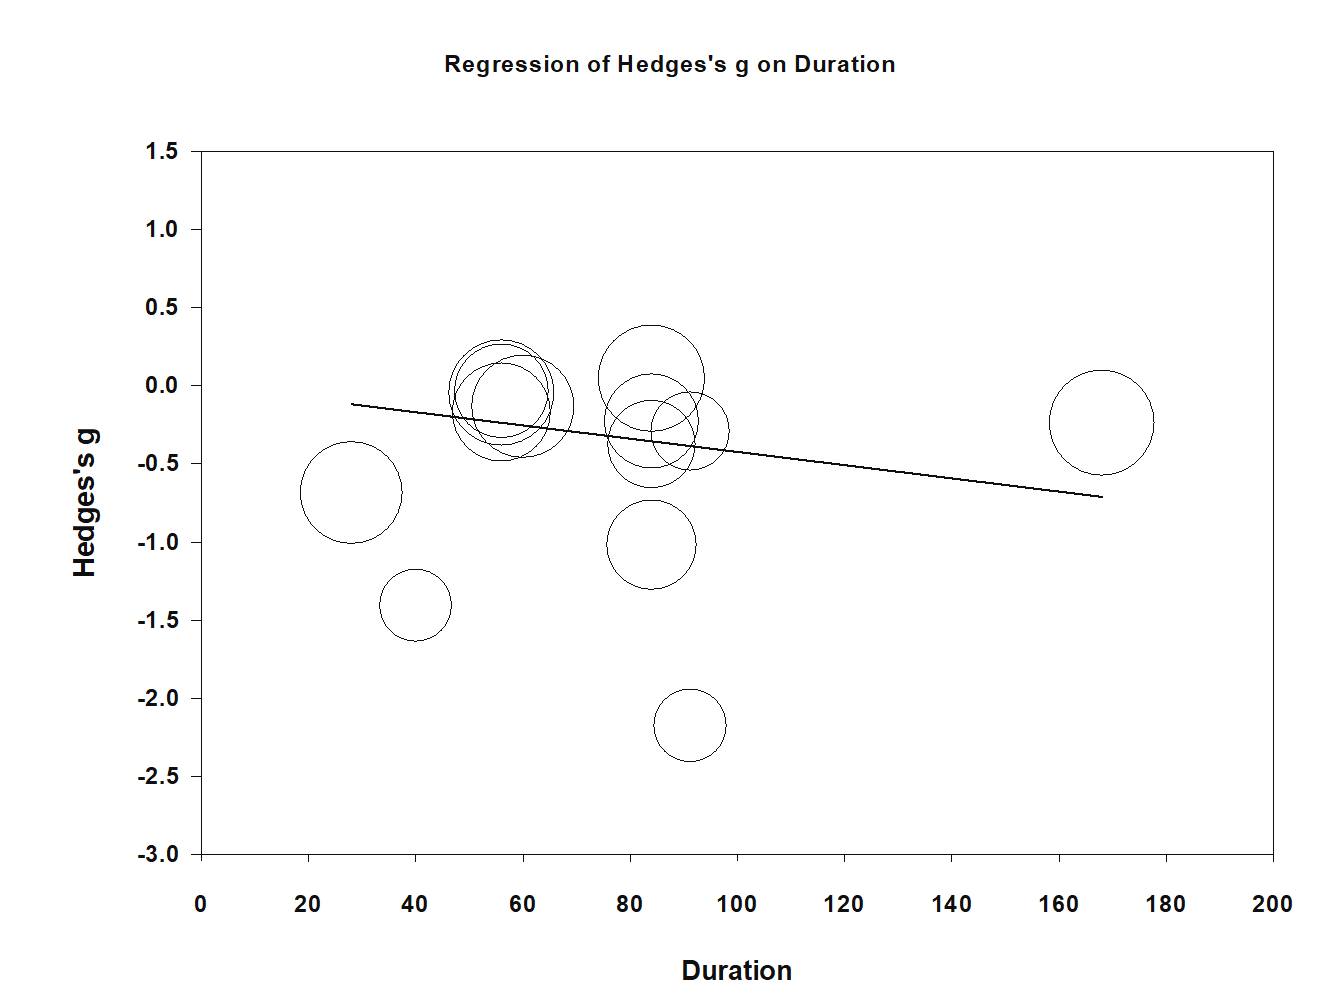
統合迴歸的小數點位數有處理到,視覺一致感很好。
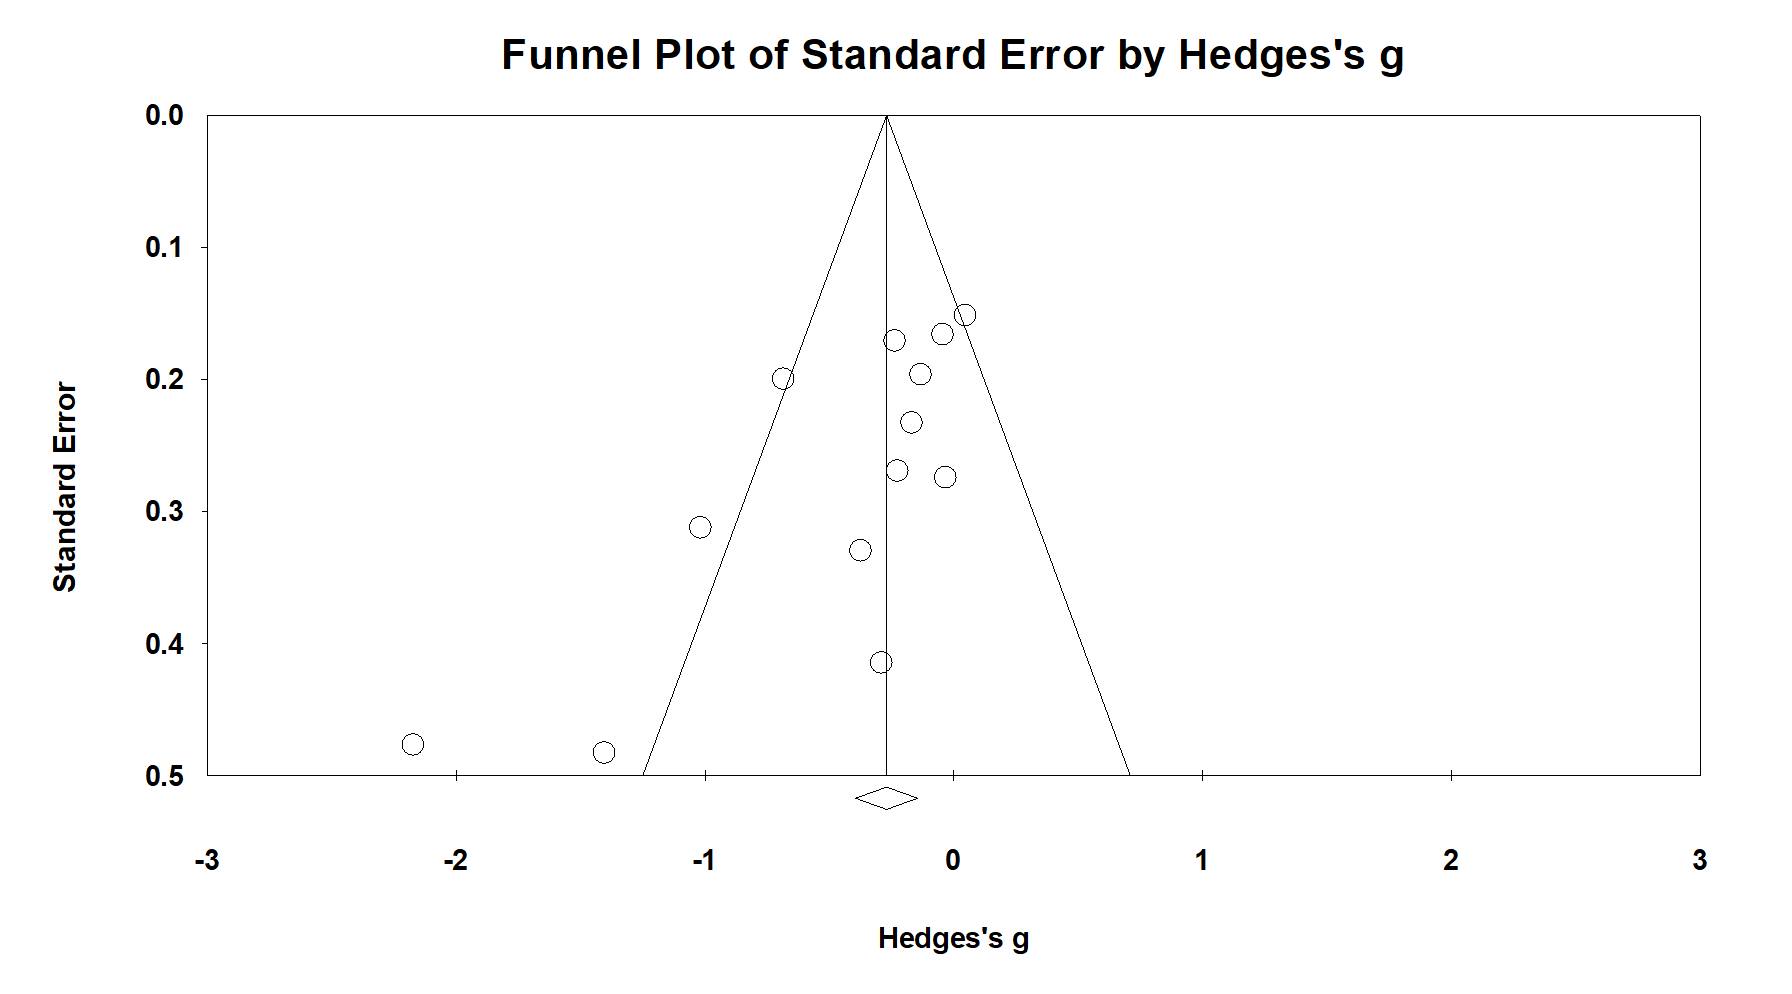
漏斗圖原廠處理,沒有問題。

副作用分析,方向性跟我們的建議一致,該一致的欄位也都跟之前一樣,很不錯。
是套簡單一致,審閱者也沒得嫌的好套圖,恭喜郭醫師!
江佩璋醫師
江佩璋醫師的作品,則是完全照我們上課的建議處理,行距沒有經過調整,整體的視覺也不錯。這也是我們現在更推薦給初學者的作法。
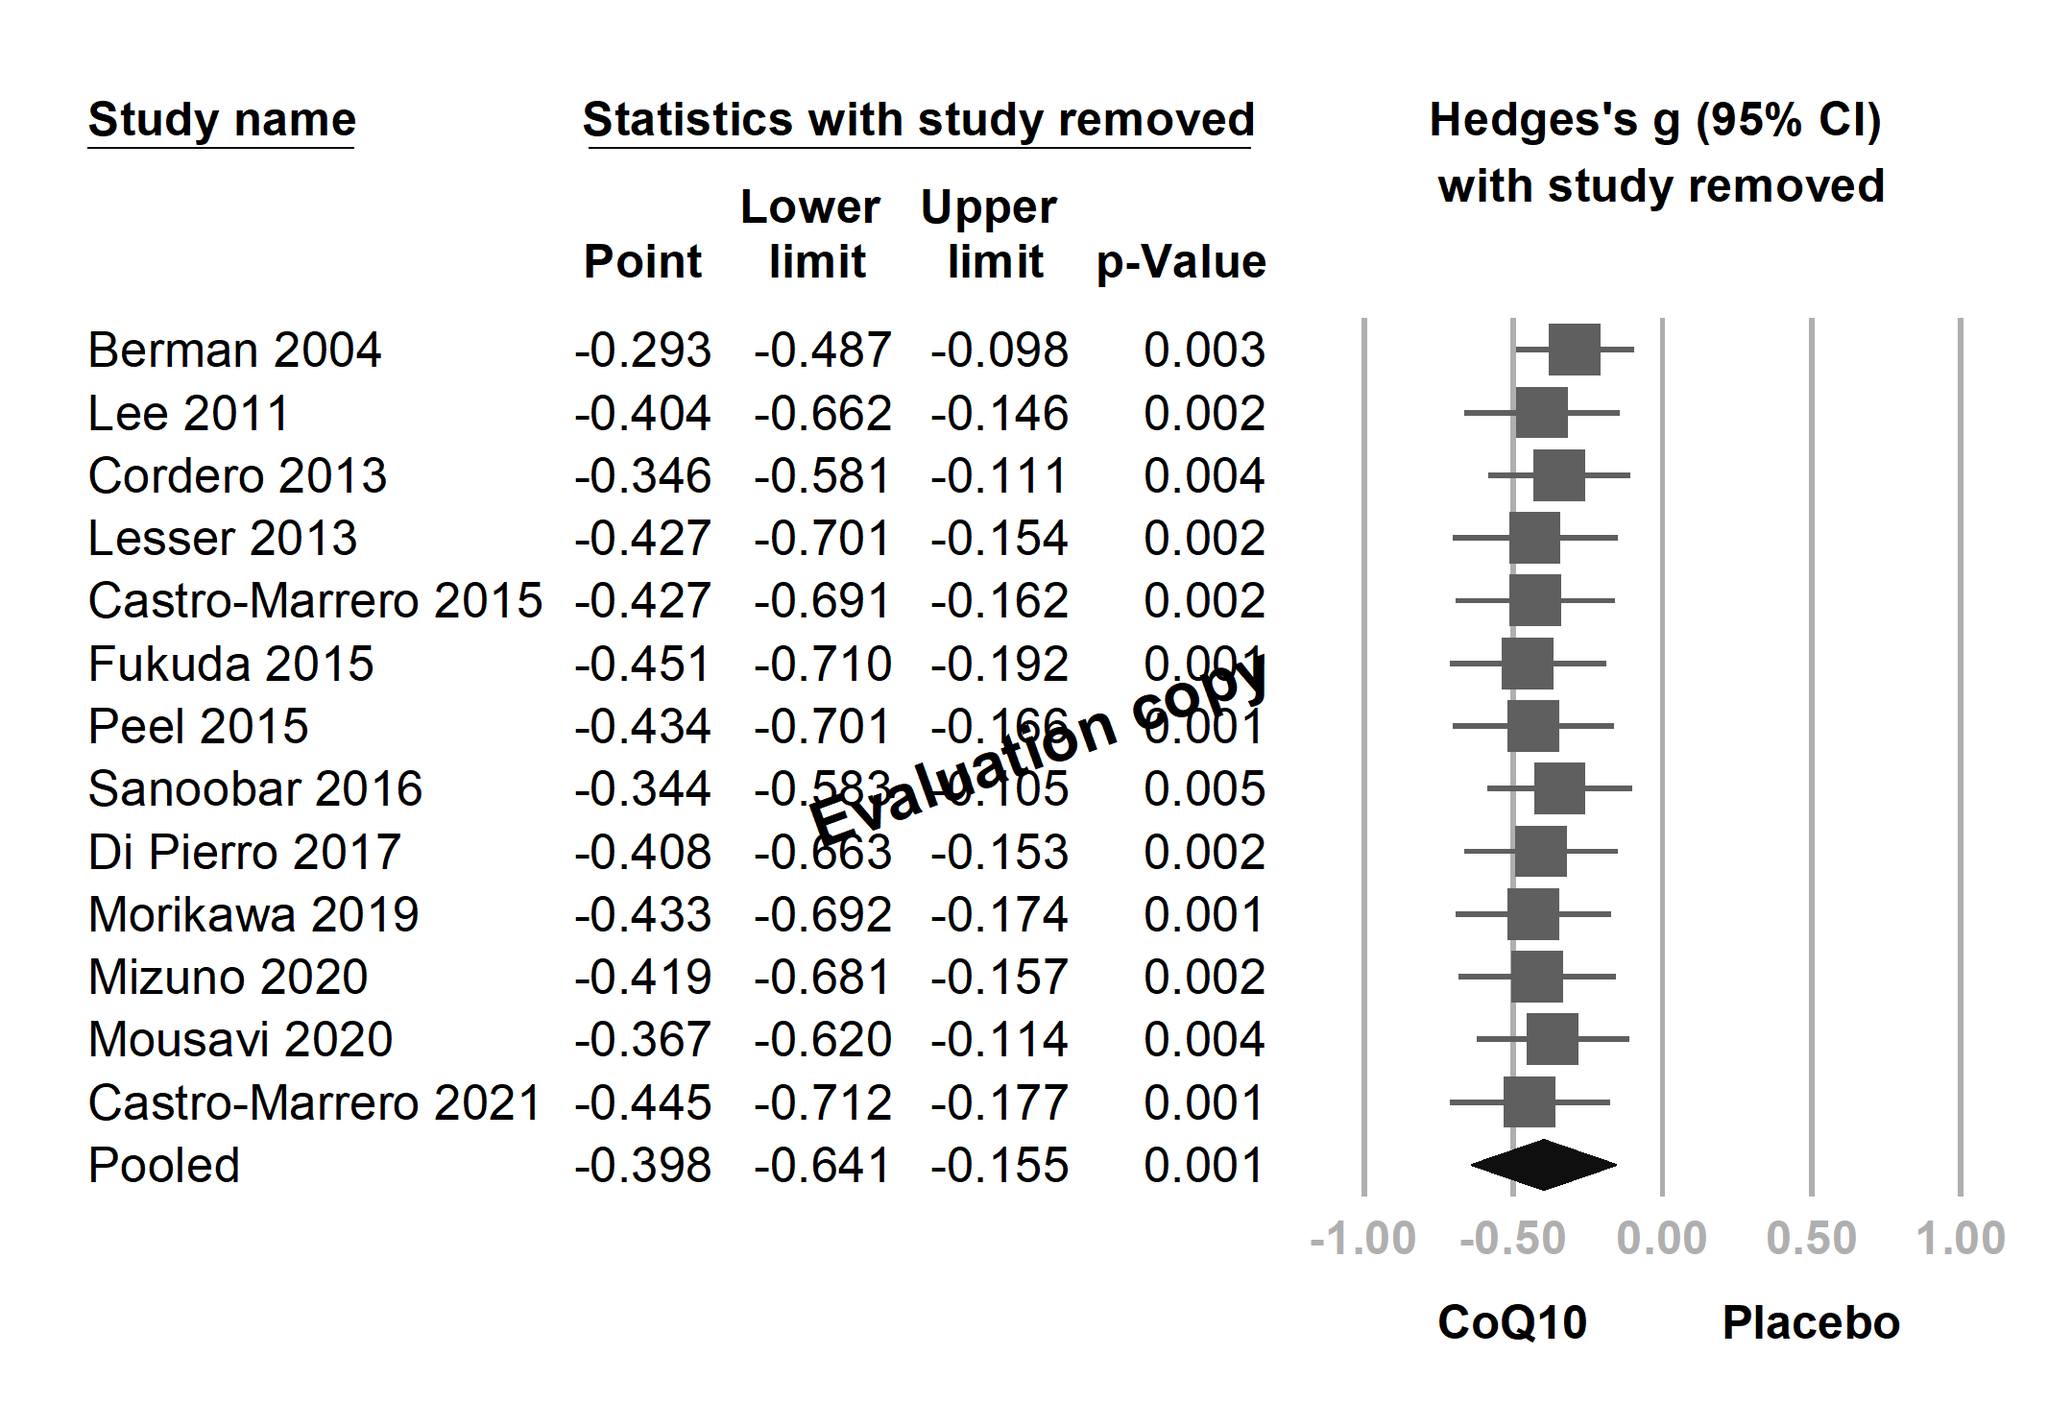
敏感性分析做得不錯,欄位跟其他圖片一致。
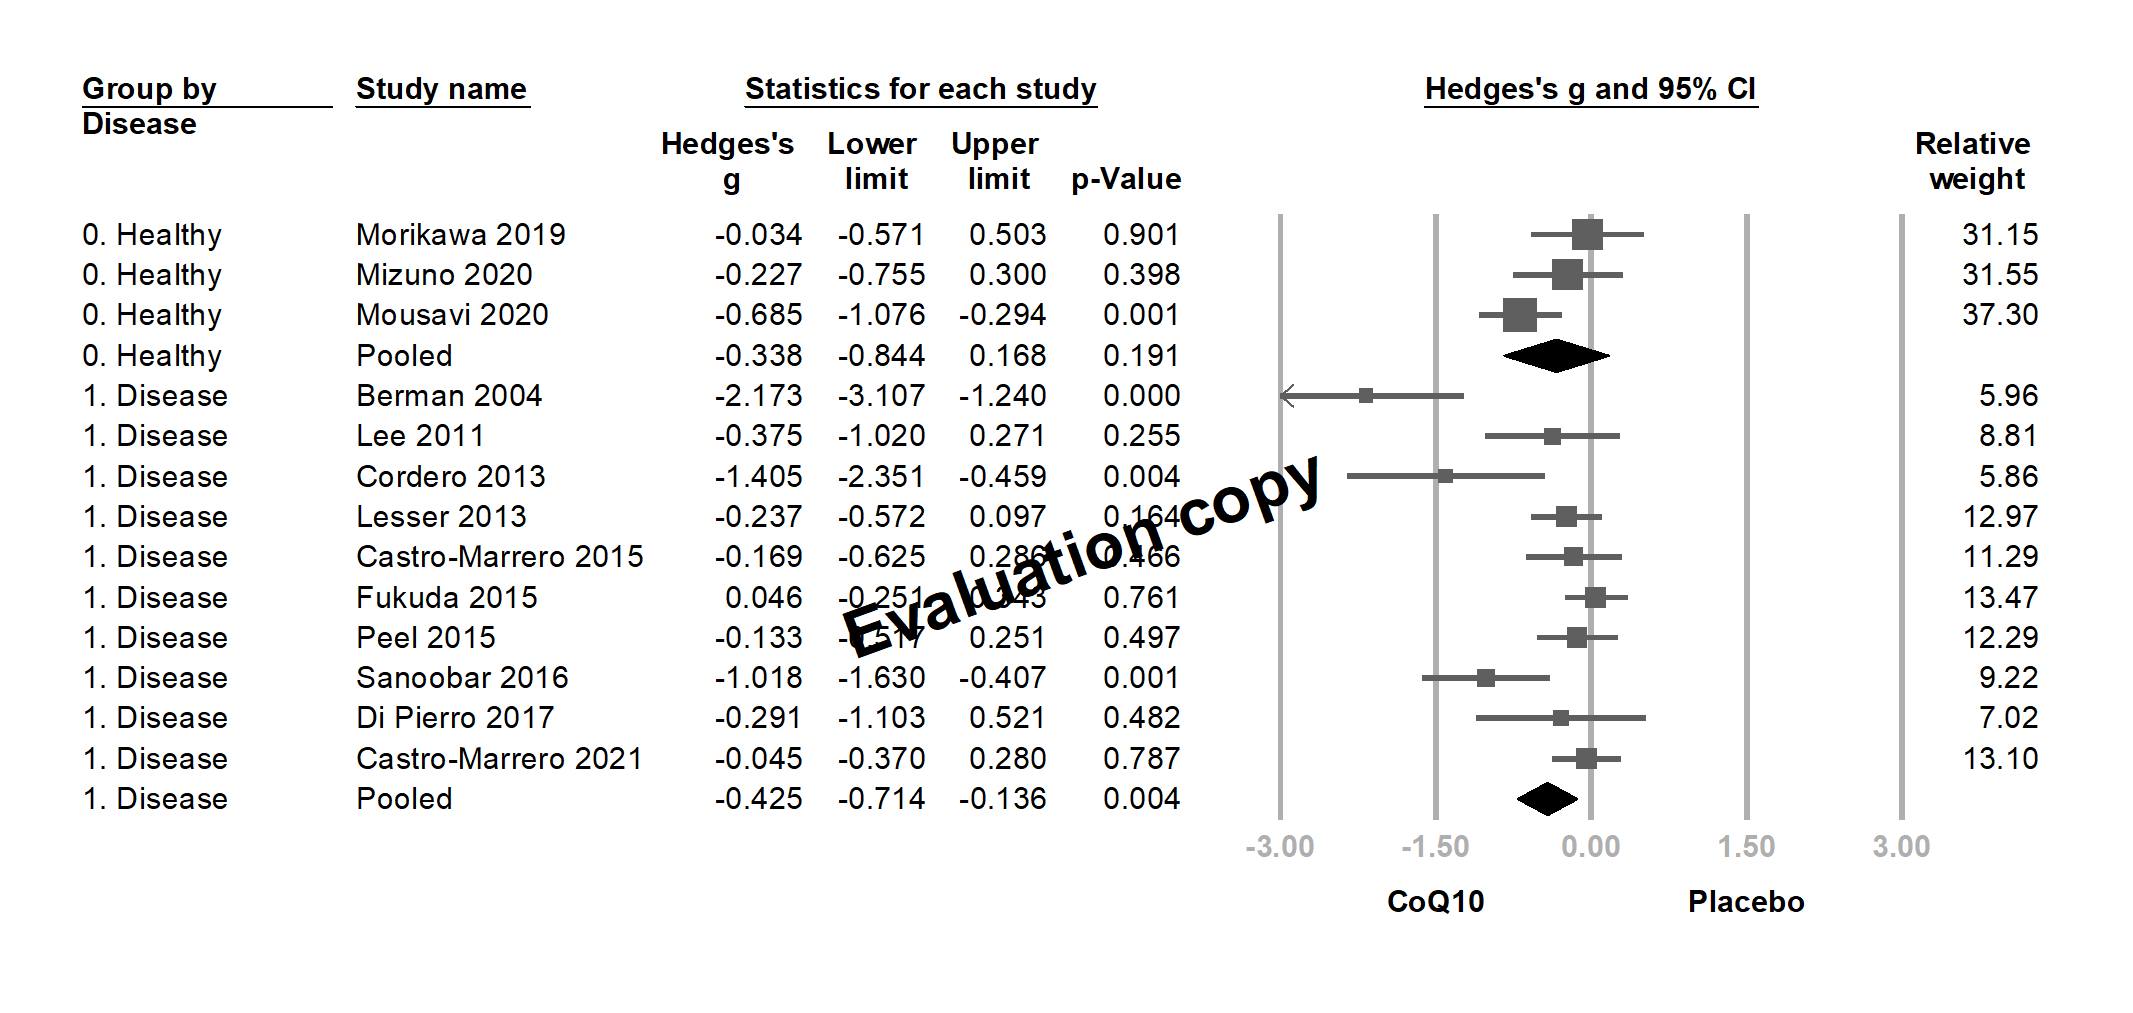
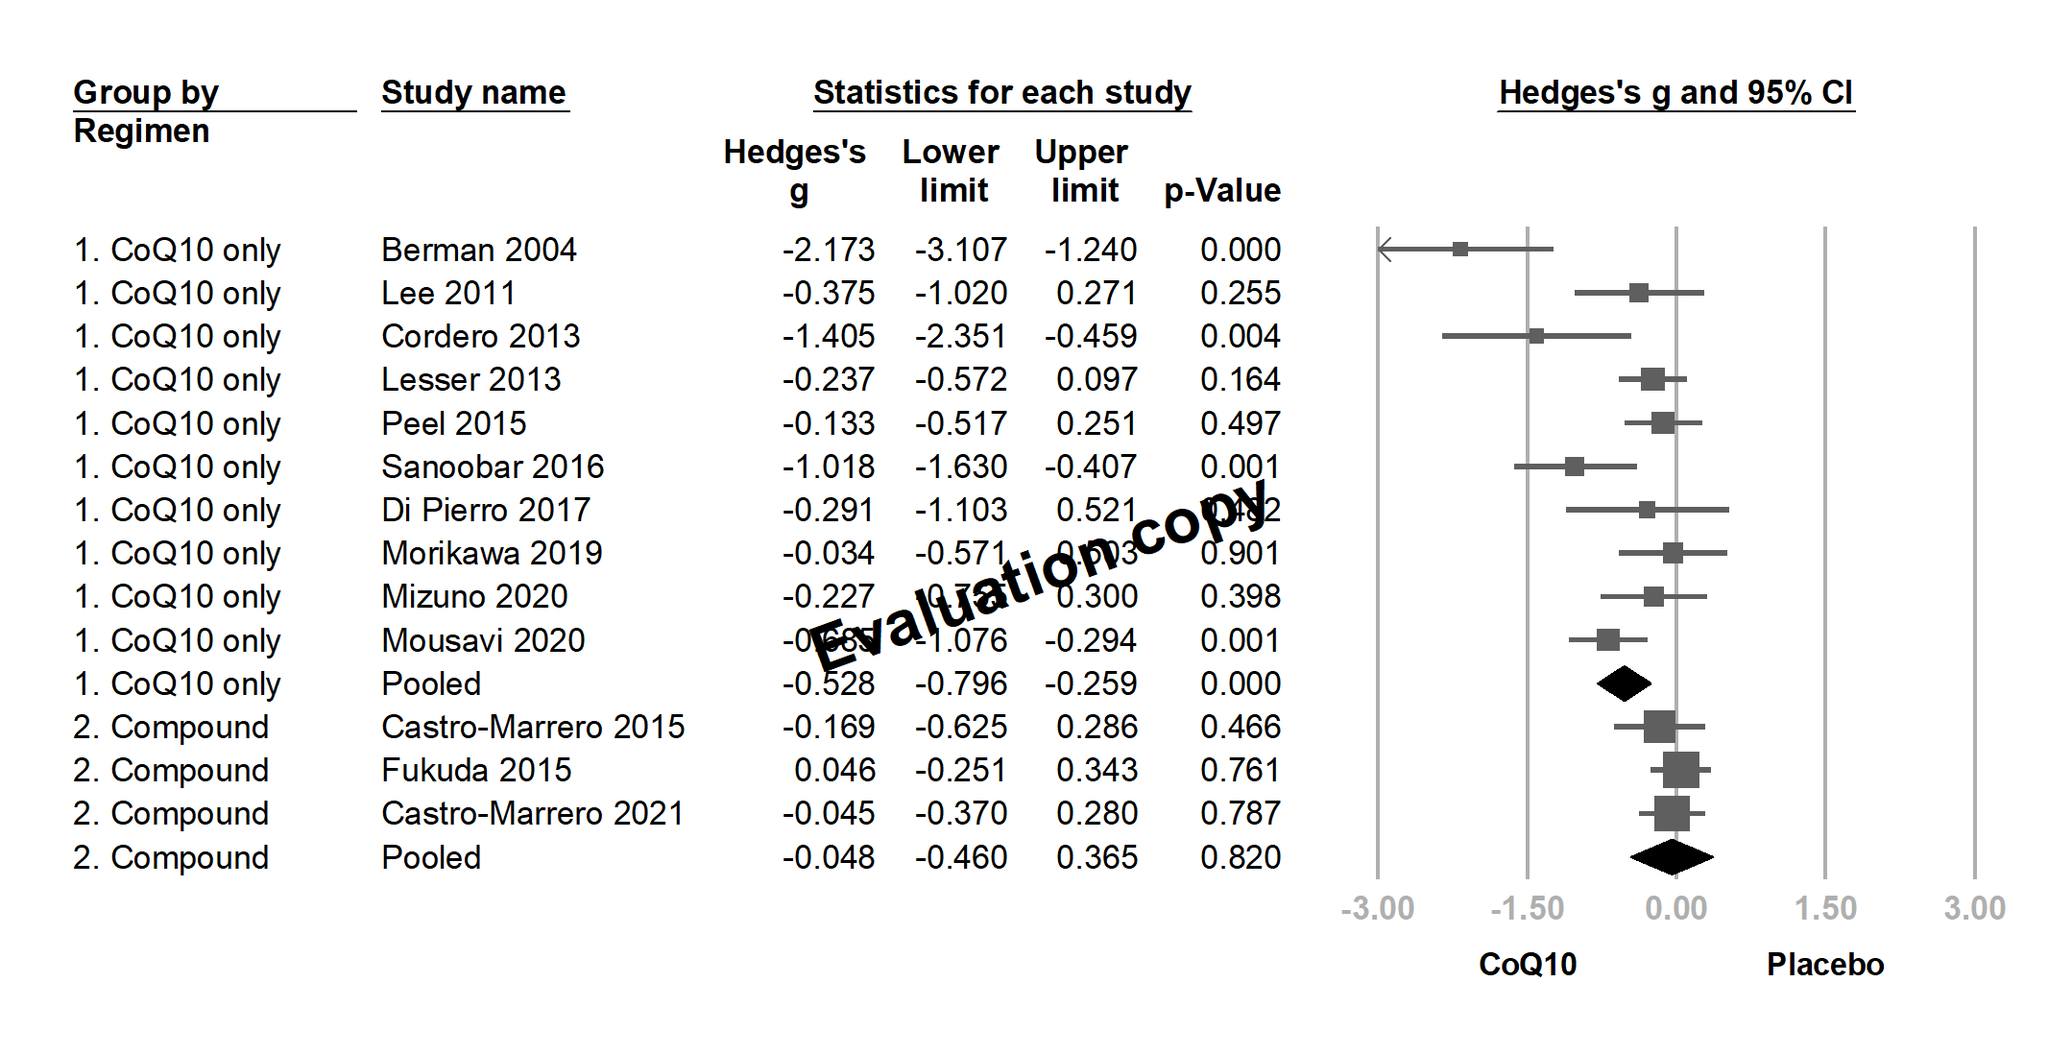
分組分析很好,兩張套圖的細節都一致,權重呈現也沒問題!
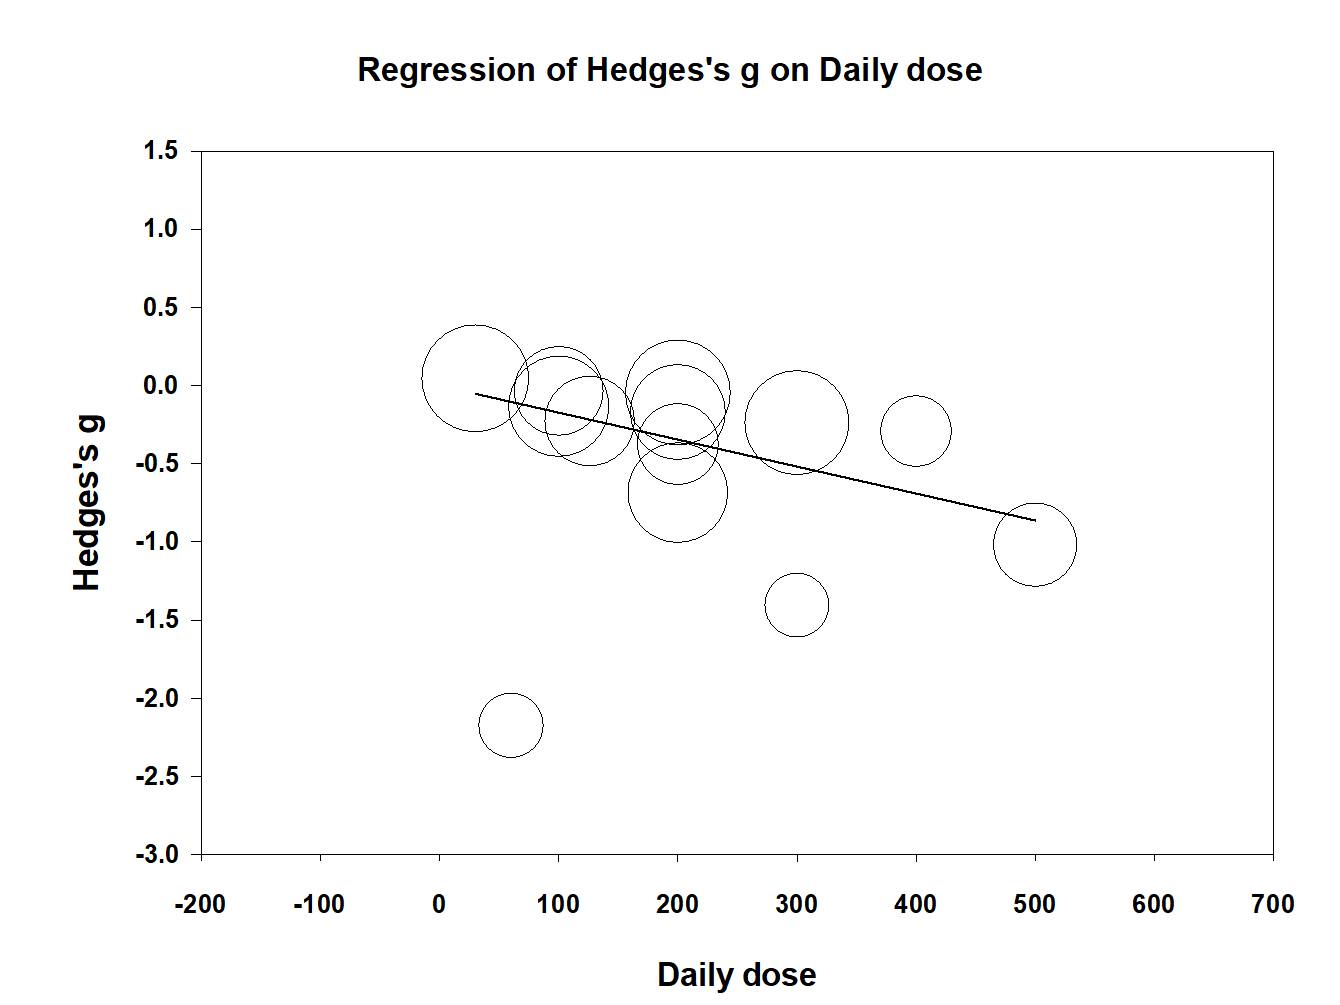
迴歸分析的小數點處理得宜,很棒。

漏斗圖原廠式樣,沒問題。

最後的副作用分析,方向與我們建議的一致,欄位與前面其他分析統一,很不錯。
這也是一套拿去投稿不會失禮,審閱者也沒得嫌的好作品,恭喜江醫師!